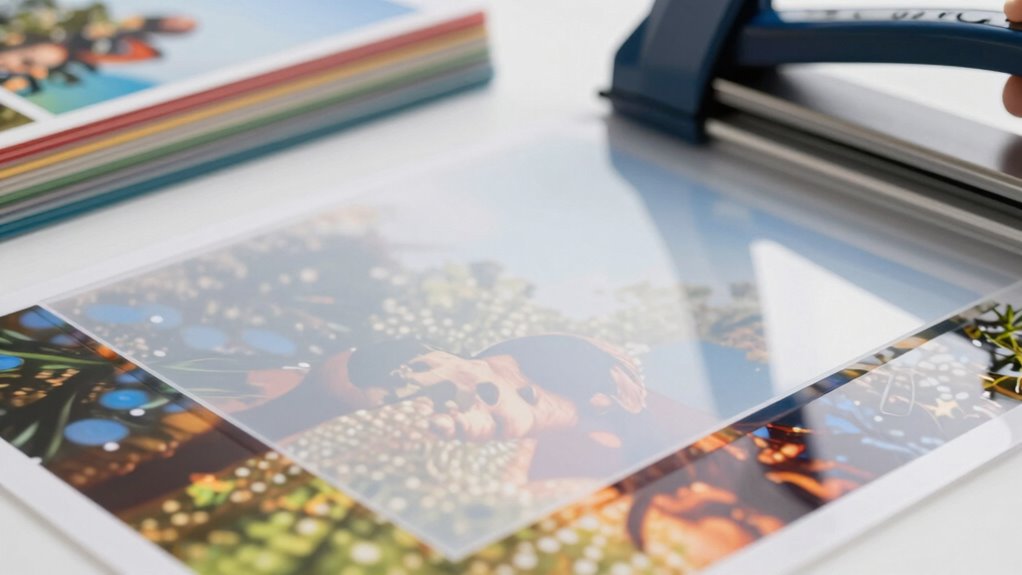
Cold lamination is a great way to protect delicate prints without using heat that could cause warping or damage. It works by applying pressure-activated adhesives that bond the laminate to your paper, making it ideal for photos, sensitive documents, and textured surfaces. With proper surface prep, quality materials, and careful application, you can achieve professional results. If you want to discover more tips and techniques, keep exploring how to get the best cold lamination for your projects.
Key Takeaways
- Cold lamination uses pressure-activated adhesives, eliminating the need for heat and preventing damage to heat-sensitive prints.
- It is ideal for protecting photographs, delicate documents, and materials prone to warping or melting.
- Proper surface preparation and alignment are essential for smooth, bubble-free lamination results.
- Selecting the right film thickness and finish enhances durability and preserves print quality.
- Cold lamination is an energy-efficient, safe method to safeguard prints without risking heat-related damage.

VIOLETTO 3mil Self-Adhesive Laminating Sheets 20 Pack, Letter Size, 8.7 x 12.2 Inches Cold Lamination Film for Photos and Documents, No Machine Needed, Crystal Clear Single Sided Vinyl
Superior Protection & Enhanced Durability: Each sheet provides a robust protective layer to safeguard your documents and photos….
As an affiliate, we earn on qualifying purchases.
As an affiliate, we earn on qualifying purchases.
What Is Cold Lamination and How Does It Work?

Have you ever wondered how cold lamination protects documents without the need for heat? It works through specially formulated lamination adhesives that bond the laminate to your paper. These adhesives are pressure-activated, so you don’t need heat to create a strong, durable seal. The process is ideal for delicate or heat-sensitive materials, preventing warping or damage. When you laminate, the adhesive adheres firmly to the paper, regardless of its thickness, whether it’s thin paper or sturdier cardstock. The key is selecting the right lamination film and adhesive that match your paper’s thickness. Cold lamination guarantees your documents stay protected, crisp, and clear without the risks associated with heat-based methods. It’s a simple, effective way to preserve your prints safely. Additionally, cold lamination is an adaptable technique that can be used for various types of content, ensuring versatility in protecting important documents. Furthermore, maintaining indoor air quality is essential, as harmful particles can accumulate in the environment where these documents are stored. Cold lamination also contributes to template compatibility by allowing you to use different types of prints without risking damage from heat. Moreover, using safety precautions while handling documents can enhance the overall preservation process. Incorporating eco-friendly practices in your lamination process can further ensure sustainability and reduce environmental impact.

INTBUYING 25×180 inch Matte Cold Laminating Film, 3mil Matte UV Luster Vinyl Cold Laminating Film, 1 Inch Core Clear Cold Lamination Cold Roll Laminate
Specification: Our cold laminating film is made of transparent PVC with pressure sensitive adhesives, the surface thickness: 3…
As an affiliate, we earn on qualifying purchases.
As an affiliate, we earn on qualifying purchases.
Benefits of Cold Lamination for Your Prints and Projects
Cold lamination offers several advantages that make it an excellent choice for protecting your prints and projects. One key benefit is its compatibility with items requiring cold storage, such as photographs or sensitive documents, since it won’t expose them to heat that could cause warping or damage. It’s also a flexible lamination alternative suitable for delicate materials like paper or thin posters, preventing heat-related issues like curling or melting. Cold lamination is quick and easy to apply, saving you time compared to traditional heat-based methods. Additionally, it’s safer to handle, reducing risks of burns or burns-related accidents. Overall, cold lamination helps preserve the quality, appearance, and longevity of your projects without the risks associated with heat-based options, offering a reliable and versatile protective solution. Furthermore, embracing inclusive casting in the design process can enhance the appeal of your laminated projects to a broader audience. Moreover, considering cabling solutions for projector installations can help ensure that your lamination projects are displayed optimally.

Crenova Laminator Machine with 10 Laminating Sheets, A4 Laminating Machine Hot & Cold with Fast Warm Technology, Thermal Laminator 9 Inch for Home Office School Business Black
🆗Fast Warm-up, Vivid Color: With 10pcs laminating pouches(10*A6), crenove laminating machine only takes 1-2 minutes to preheat. Crenova…
As an affiliate, we earn on qualifying purchases.
As an affiliate, we earn on qualifying purchases.
How to Choose the Best Cold Lamination Sheets and Films
Choosing the right cold lamination sheets and films depends on understanding your project’s specific needs. First, consider color matching; select films with clear, transparent properties to preserve the original print colors or opt for tinted options if you want added effects. Next, evaluate lamination thickness. Thinner films (1.5-3 mil) are ideal for lightweight documents and frequent handling, while thicker films (5-7 mil) provide extra durability and protection for items exposed to wear. Also, think about the type of project—whether it requires a glossy or matte finish—since this impacts the appearance after lamination. Matching the film’s attributes with your project’s demands ensures a professional, long-lasting result without compromising image quality.

CAREGY 200 Count Thermal Laminating Pouches,5Mil,Hold 2 x 3.5 inch Business Card Laminate Pouches for Laminator, Clear Lamination Paper Protection 2.3 x 3.7 inch, Round Corner, Home & Office
Fits Business Card-Size Pouches: Contains business card-size pouches that fit items up to 2 x 3.5 in,200 pack,…
As an affiliate, we earn on qualifying purchases.
As an affiliate, we earn on qualifying purchases.
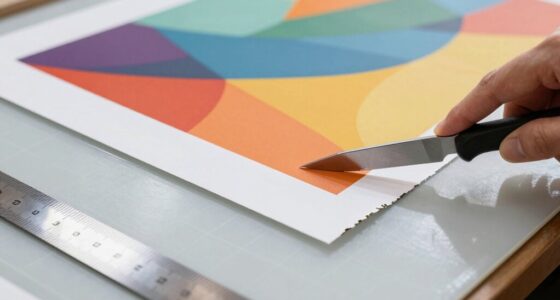
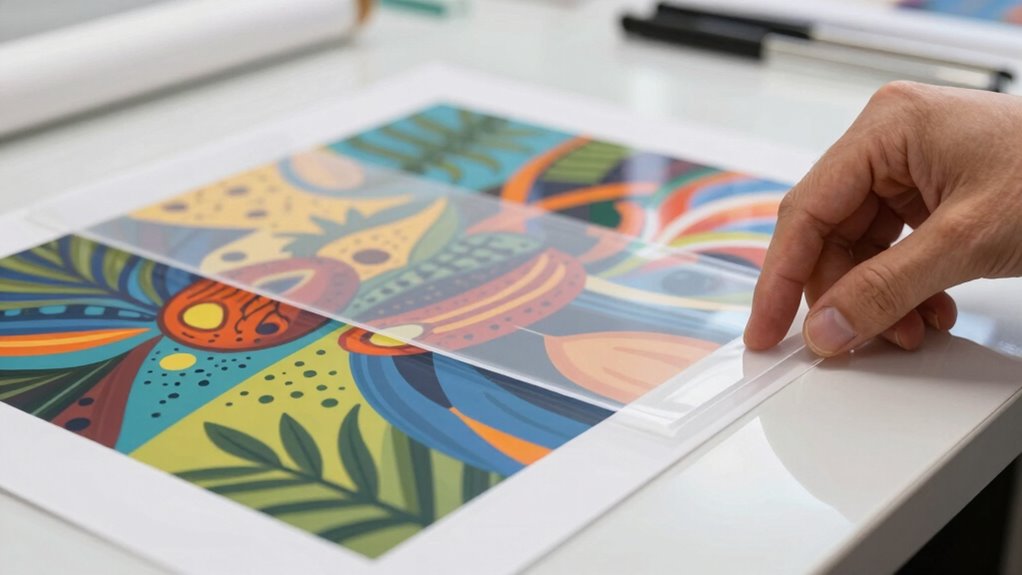
A Step-by-Step Guide to Cold Lamination at Home

Laminating at home without heat is a straightforward process that anyone can master with the right supplies and instructions. First, gather your cold lamination sheets, ensuring they’re compatible with your prints. Start by preparing your print—perform color correction if needed, so the colors look vibrant and true to life. If your print needs resizing, do so before lamination to avoid issues later. Carefully place your print between the lamination sheets, aligning edges precisely. Smooth out any bubbles or wrinkles with a squeegee or a credit card, working from the center outward. Informal language can sometimes be used to describe techniques like this, so be sure to follow the instructions closely. Additionally, utilizing sustainable materials in your printing process can enhance the environmental benefits of your project. Seal the edges tightly to prevent air exposure. This method protects your prints without risking heat damage, preserving fine details and maintaining print quality. Using vinyl cutter settings can help ensure that your prints are cut accurately before lamination, enhancing the final presentation.
When Should You Use Cold Lamination Instead of Heat Lamination?

You should consider cold lamination when working with sensitive materials that could be damaged by heat, such as photographs or certain plastics. Cold lamination prevents heat-related warping, ensuring your items stay intact and undistorted. If avoiding heat damage is a priority, using cold lamination is the smarter choice. Additionally, precious metal investments often require careful handling to maintain their condition, similar to how cold lamination protects sensitive items. Using materials like Supprim fabric can also enhance the durability and longevity of your prints without the risk of heat exposure. Furthermore, maintaining adequate hydration can help preserve the integrity of certain materials during the lamination process. Proper paint straining techniques can also ensure that your lamination process goes smoothly, preventing any imperfections in the final product. In addition, ensuring color accuracy during the lamination process can significantly enhance the overall quality of your prints.
Material Sensitivity Concerns
Have you ever wondered when cold lamination is a better choice than heat lamination? If your materials are sensitive to heat or prone to warping, cold lamination is ideal. It’s also better when surface handling is delicate, such as with glossy or textured finishes that could be damaged by heat. Additionally, using cold lamination can help preserve resale value for prints that may be collected or sold in the future.
Consider this table:
| Material Compatibility | Surface Handling |
|---|---|
| Heat-sensitive items | Fragile or textured surfaces |
| Thin or delicate papers | Items prone to curling or warping |
| Photos or prints with ink that may run | Coated or glossy surfaces |
Use cold lamination when material sensitivity or surface handling requires gentle, heat-free protection to prevent damage and preserve quality.
Avoiding Heat Damage
When materials are sensitive to heat, applying cold lamination can prevent irreversible damage. This is especially important for items with delicate inks, photographs, or certain plastics that might warp or discolor with heat. Cold lamination also enhances lamination safety by reducing the risk of burns or overheating. Additionally, it’s an eco-friendly choice, often producing less waste and requiring no energy-intensive heat sources. Use cold lamination when you want to maintain the integrity of fragile prints or minimize environmental impact. It’s ideal for documents that include adhesive-backed materials or heat-sensitive inks. By choosing cold lamination, you protect your prints without risking damage, ensuring longevity and a cleaner, greener process.
- Protects heat-sensitive materials
- Reduces energy consumption
- Minimizes risk of warping or discoloration
- Supports environmentally conscious practices
Common Mistakes to Avoid When Cold Laminating

To get the best results with cold lamination, you need to avoid common pitfalls like neglecting proper surface preparation or using low-quality materials. Rushing through the process can lead to bubbles, wrinkles, or poor adhesion. Paying attention to these details guarantees a smooth, professional finish every time. Additionally, using high-quality materials can significantly enhance the durability and appearance of your laminated prints. Incorporating car protection accessories can be an innovative way to protect your laminated creations. Understanding the importance of regional flavors in other contexts can also inspire creativity in your design choices. Moreover, selecting top-rated animated films can provide great inspiration for color and design elements in your projects. Remember that using water parks for a refreshing break can also spark new ideas for your creative endeavors.
Improper Surface Preparation
Proper surface preparation is essential for achieving a smooth, wrinkle-free cold lamination. If you skip cleaning or rush the prep, surface contamination can cause bubbles, wrinkles, or adhesion issues. Additionally, improper alignment can lead to uneven lamination, wasting materials and time. Before laminating, verify the surface is free of dust, grease, or fingerprints. Carefully check that your print is aligned correctly on the lamination sheet to avoid skewed edges.
- Clean the surface thoroughly with a lint-free cloth and appropriate cleaner
- Remove all dust, dirt, and oils to prevent surface contamination
- Double-check alignment before applying the lamination film
- Use rulers or guides for precise placement and positioning
Additionally, understanding proper lamination techniques can significantly enhance the quality of your finished product.
Using Low-Quality Materials
Are you tempted to cut corners by using cheap or low-quality materials for cold laminating? While it might seem like a good way to save money, using inferior supplies can lead to poor adhesion, bubbles, and a dull finish. For DIY craft projects, sticking with budget material options that are specifically designed for cold lamination guarantees better results. Low-quality laminating films or adhesives often don’t stick well or peel over time, which defeats the purpose of protecting your prints. Investing in decent materials prevents waste and rework, saving you time and frustration in the long run. Remember, quality matters, especially when it comes to safeguarding important prints or craft projects. Skimping on materials can compromise the durability and appearance of your laminated items.
Rushing the Lamination Process
Rushing through the lamination process is a common mistake that can undermine even the best materials. When you prioritize quick application over proper technique, you risk air bubbles, wrinkles, or uneven coverage. The rush timing often leads to sloppy results and may compromise the protection the lamination offers. To avoid this, take your time to carefully align and smooth the material as you apply it. Don’t skip essential steps just to finish faster. Proper patience ensures a clean, professional finish and maximizes the durability of your print.
- Skipping the slow, deliberate application for quick application
- Neglecting to remove air bubbles immediately
- Overlooking the importance of proper alignment before sealing
- Ignoring the need to check for wrinkles or trapped debris
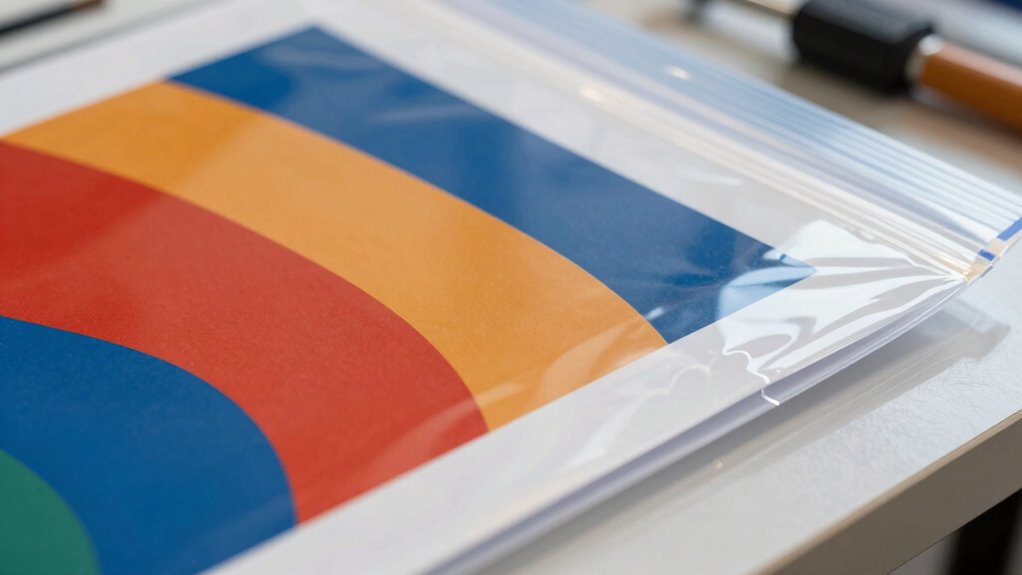
Tips for Achieving Professional-Looking Cold Laminated Projects
Achieving a professional look with cold lamination starts with careful preparation and attention to detail. Start with a creative design that’s clean, well-aligned, and free of smudges or wrinkles. Use high-quality prints to guarantee print durability, as crisp images and sharp text look more polished once laminated. Before applying the lamination, double-check that your print is completely dry and free of dust or debris. When sealing, work slowly and steadily, smoothing out air bubbles with a squeegee or credit card to achieve a smooth, even finish. Proper trimming afterward helps prevent peeling edges and gives your project a neat, finished appearance. Additionally, consider how the right engine upgrades can enhance performance by optimizing the overall efficiency of your project. These tips help you deliver cold laminated projects that look professional and stand the test of time. Additionally, understanding the importance of ethical consumer choices can enhance the value of your projects by ensuring that the materials used are responsibly sourced.
Troubleshooting Cold Lamination Problems for Perfect Results

Even with careful preparation, issues can still arise during cold lamination that affect the final look and durability of your project. Common problems include air bubbles, wrinkles, uneven adhesion, and material incompatibility. To troubleshoot effectively, review your lamination techniques, ensuring smooth application and consistent pressure. Check that your laminating film is compatible with your print material, as mismatched materials can cause peeling or cloudiness. For air bubbles, use a squeegee or roller to push out trapped air slowly. If wrinkles appear, verify that your paper and film are free of dust and debris before lamination. Always test different material combinations beforehand to prevent compatibility issues. Proper troubleshooting helps achieve professional results and extends your project’s lifespan. Additionally, understanding the testing accuracy of your tools can significantly improve the quality of your lamination process.
Frequently Asked Questions
Can Cold Lamination Be Used on All Types of Paper?
Cold lamination can be used on most paper types, but you should check for paper compatibility first. It offers good lamination durability and is ideal for delicate or heat-sensitive papers that might warp or curl with heat-based lamination. However, thicker or textured papers may not adhere properly or could be damaged. Always test a small area first to verify the lamination process works well with your specific paper type.
How Long Does Cold Lamination Typically Last?
You might wonder how long cold lamination lasts, and it’s a fair question. Typically, it offers durability for several years, but durability concerns depend heavily on material compatibility and environmental factors. If you use the right adhesive film and avoid excessive exposure to moisture or sunlight, your laminated prints can stay protected and vibrant for a long time. Just choose quality materials, and you’ll enjoy lasting results.
Is Cold Lamination Environmentally Friendly?
Cold lamination can be considered environmentally friendly because it uses no heat, reducing energy consumption, and often involves eco-friendly alternatives like biodegradable laminates. However, you should consider chemical considerations, such as the type of adhesive used, to guarantee minimal environmental impact. By choosing eco-friendly materials and avoiding harmful chemicals, you can make cold lamination a more sustainable option for protecting your prints.
Can I Remove Cold Lamination if Needed?
Yes, you can remove cold lamination if needed. The removal process involves gently peeling back the laminated layer, starting at one corner and slowly working your way across to avoid tearing the print. Keep in mind, re lamination options are available if you want to reapply a new laminate layer afterward. Just be patient during removal to prevent damaging your print, and consider consulting a professional for delicate or valuable items.
Does Cold Lamination Affect Print Quality or Color?
Notably, cold lamination generally doesn’t affect print quality or color; in fact, it helps preserve both. You’ll notice that color preservation remains vibrant, and print clarity stays sharp because cold lamination doesn’t involve heat that could distort or fade images. As a result, your prints stay protected without risking damage, making cold lamination an excellent choice when maintaining the integrity of colors and details is essential.
Conclusion
Cold lamination is a fantastic way to protect your prints without risking heat damage. It’s easy to use and perfect for delicate or heat-sensitive materials. Don’t worry if you make a mistake—practice makes perfect! With the right supplies and patience, you’ll achieve professional-looking results every time. Plus, it’s budget-friendly and versatile. So go ahead, give cold lamination a try—you’ll love how your projects stay pristine and vibrant!