Underpainting is your foundation for successful oil and acrylic art, setting up composition, tone, and mood early on. It helps you build depth, harmony, and accurate values, acting as a roadmap for layers to come. Oil paints allow for slow blending, while acrylics need quick layering to achieve richness. Mastering these techniques boosts your control and the vibrancy of your work. Keep exploring, and you’ll discover how to create stronger, more cohesive paintings from the ground up.
Key Takeaways
- Underpainting establishes composition, tone, and mood, serving as a roadmap for the final artwork in both oil and acrylic painting.
- It uses limited hues or grayscale to create a strong tonal foundation, reflecting light and shadow accurately.
- Layering techniques begin with broad strokes to define major shapes, gradually adding detail and contrast for depth.
- Oil and acrylic underpainting differ in drying times, affecting layering strategies and the final vibrancy of colors.
- Mastering underpainting builds a solid base, improves overall harmony, and enhances the luminosity and professionalism of the finished piece.

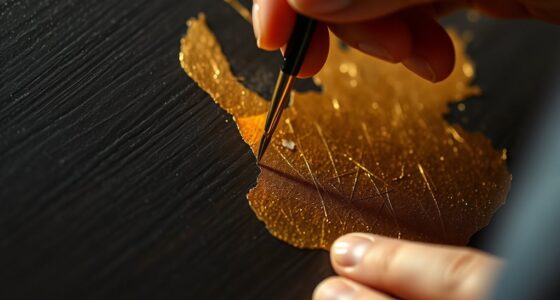
Have you ever wondered how artists build the foundation of a painting? It all begins with underpainting, a pivotal step that sets the stage for the final piece. When you start an underpainting, you’re fundamentally laying down a monochromatic sketch that establishes composition, tone, and mood. This initial layer acts as a roadmap, guiding subsequent layers and ensuring your painting stays cohesive. In both oil and acrylic painting, mastering the art of underpainting allows you to control the overall harmony of your work before adding details and color.
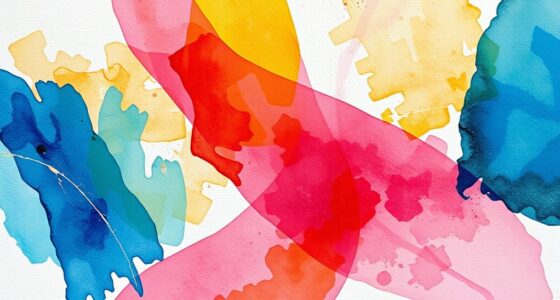
Color mixing plays an indispensable role during this stage. Since underpainting often involves limited hues or a grayscale palette, your goal is to create a strong tonal foundation that accurately reflects the light and shadow in your scene. You might mix a few shades of gray or earth tones, carefully blending them to match the values you envision. This process helps you understand the relationships between different areas of your composition and creates a visual blueprint. As you work, you’ll notice that your color mixing skills improve because you learn to achieve subtle variations in tone with fewer strokes, saving time and effort later on.
Mastering tonal harmony with limited palettes enhances your underpainting’s foundation.
Layering techniques are fundamental for building depth and dimension in your underpainting. You start with broad, loose strokes to block in major shapes and establish the overall structure. As you progress, you add more layers, gradually refining forms and intensifying contrasts. Using layering techniques, you can control the transparency and opacity of your paint, which is especially important in oil painting where slow drying allows for blending and adjustments. Acrylics dry quickly, so layering becomes even more essential to build richness and texture without muddying your colors. Applying thin, transparent layers over dried or semi-dried paint gives your underpainting a luminous quality, setting a solid base for subsequent color applications.
This layered approach also allows you to correct mistakes early on. If you realize a shape or value isn’t quite right, you can adjust it in later layers without disturbing the entire composition. The key is to work with patience, letting each layer dry partially before adding the next to prevent lifting or mixing unwanted colors. Over time, your skill in layering techniques will improve, giving your paintings more vibrancy, depth, and a polished look. Underpainting isn’t just a preliminary step; it’s the foundation upon which your entire artwork rests, and mastering color mixing and layering techniques will make your finished piece more harmonious and compelling.
Top picks for "underpaint build foundation"
Open Amazon search results for this keyword.
As an affiliate, we earn on qualifying purchases.
Frequently Asked Questions
How Does Underpainting Influence the Final Color Palette?
Your underpainting influences the final color palette by establishing a base for color harmony and tonal development. It guides your choices, helping you balance warm and cool tones early on, which enhances the overall unity of your artwork. By refining the tonal values first, you create a strong foundation that affects how vibrant or muted your colors appear later. This process guarantees your final piece has depth, coherence, and visual harmony.
What Are the Best Brushes for Applying Underpainting?
You should choose brushes with a flat or filbert shape for underpainting, as they offer broad strokes and control. Opt for stiff bristles, like hog or synthetic, to lay down opaque layers smoothly and efficiently. These brushes help you cover large areas quickly and provide the precision needed for sketching and underpainting details. Avoid soft brushes, which aren’t suitable for the bold, initial layers in your underpainting process.
Can Underpainting Be Used in Mixed Media Artworks?
Yes, you can definitely use underpainting in mixed media artworks. It enhances your layering techniques and adds depth to your piece. By applying an underpainting first, you create a strong foundation that interacts well with other media like collage, ink, or pastel. This mixed media compatibility allows you to experiment freely, building complex textures and visual interest while maintaining a cohesive overall composition.
How Long Should Underpainting Dry Before Adding Color Layers?
Think of your underpainting as a stage set; it needs time to dry before adding vibrant actors. Typically, you should wait 24 to 48 hours, but drying time varies with environmental factors like humidity and temperature. If it’s damp or humid, give it extra time. Rushing can cause smudging or cracking, so be patient and make certain your underpainting is thoroughly dry to achieve a smooth, lasting finish.
Are There Specific Brands Recommended for Underpainting Mediums?
You should choose brand recommendations like Winsor & Newton, Grumbacher, or Liquin for underpainting mediums. For medium selection, opt for products that suit your painting style, such as alkyds for quick drying or traditional mediums for more blending time. These brands offer reliable options, ensuring your underpainting dries properly and provides a solid foundation for subsequent layers. Always follow the manufacturer’s instructions for best results.
Conclusion
Don’t shy away from underpainting, even if it feels intimidating at first. It’s the secret to creating depth, harmony, and a solid foundation for your artwork. Some might say it’s unnecessary, but skipping this step can leave your piece feeling flat or unbalanced. Embrace underpainting, and you’ll find your paintings become more vibrant and cohesive. Start small, experiment, and watch your skills grow—your future masterpieces will thank you!