If your fine lines fail during your stencil work, it’s often due to using thin, fragile materials that tear or smudge, or not properly preparing your surface, which causes bleeding. Poor application techniques, such as uneven paint layers or shifting stencils, can also ruin delicate details. To fix these issues, you need to select durable materials, guarantee smooth surfaces, and apply paint carefully. Keep going to discover proven ways to keep your lines sharp and long-lasting.
Key Takeaways
- Use fragile or low-quality stencil materials that easily tear or smudge during application.
- Insufficient surface preparation causes bleeding, smudging, and loss of fine detail.
- Improper adhesion or uneven surfaces lead to stencil shifting and broken fine lines.
- Applying thick or uneven paint layers causes bleeding, obscuring delicate details.
- Handling the stencil roughly or not securing it properly damages intricate, fragile lines.

20 Pack 7.5mil Mylar Sheets, 12 X 12 Inch Stencil Paper for Cricut, Laser Cutting, Template Plastic for Quilting, Blank Plastic Sheets for Crafts, Food Grade Mylar Stencil Sheets
STURDY FOR MAKING REUSABLE STENCILS: These stencil paper are perfect for creating reusable stencils. They are made of…
As an affiliate, we earn on qualifying purchases.
As an affiliate, we earn on qualifying purchases.
Why Do Fine Lines Fail in Your Stencils: And How Can You Fix Them?

Fine lines often fail in your stencils because they’re too delicate to withstand the application process. When the stencil isn’t durable enough, the fine lines can tear or smudge, ruining your design. This happens when the stencil material lacks sufficient stencil durability, especially for intricate, fine line artistry. To fix this, choose stencils made from sturdier materials that can handle the pressure of application and removal without damage. Using a reliable adhesive or applying less force during placement also helps maintain the integrity of fine lines. Proper preparation and careful handling are essential to guarantee delicate details. Investing in high-quality materials designed for detailed work ensures your fine lines stay crisp and intact, giving your artwork a professional finish and preventing future failures.

10PCS 7mil Blank Mylar Stencil Sheets,12X12 inch Milky Translucent PET Blank Stencils Sheets,Template Material for Cutting Machines, Laser Cutting, Food-Safe Craft Plastic
STURDY FOR MAKING REUSABLE STENCILS : 7Mil (0.1778mm / .007") thick, 10 PCS, 12X12 inch/30.5X30.5cm, large and wide…
As an affiliate, we earn on qualifying purchases.
As an affiliate, we earn on qualifying purchases.
How to Choose the Best Materials for Sharp, Long-Lasting Fine Lines
Choosing the right materials is key to creating sharp, durable fine lines. You should consider options with excellent adhesion that won’t peel or smudge, even with repeated use. Flexibility also matters, so your stencil material moves with your project without tearing. Additionally, exploring digital content formats can help you identify innovative materials that enhance your stencil designs.
Optimal Material Types
Selecting the right materials is essential if you want your stencil lines to stay sharp and last through multiple uses. For maximum durability, choose materials like Mylar or high-quality plastic, which resist tearing and deformation. These materials maintain their shape over time, ensuring consistent, crisp lines. Surface preparation also plays a crucial role—clean, smooth surfaces help prevent imperfections that can cause bleeding or uneven edges. Thin, flexible materials often produce finer lines, but make sure they’re sturdy enough to withstand repeated application. Avoid flimsy or brittle options that crack or warp easily. By selecting durable materials designed for fine detail and properly preparing your surface, you set a solid foundation for sharp, long-lasting stencil lines that hold up through your project’s demands. Additionally, consider how color accuracy can enhance the visibility of your fine lines, making your work stand out even more. Incorporating techniques that promote optimal recovery can also help maintain your tools in top condition, ensuring they perform well throughout your projects.
Adhesion and Flexibility
When picking materials for your stencil, paying attention to adhesion and flexibility guarantees your lines stay sharp over multiple uses. Your material’s surface texture affects how well it adheres—smoother surfaces usually stick better, reducing bleed. Flexibility is equally important; a flexible stencil can bend and conform to uneven surfaces, preventing tearing or lifting that blurs fine lines. Environmental factors like humidity, temperature, and exposure to chemicals also influence adhesion. In high humidity, choose materials with stronger adhesive properties, while in dry conditions, less sticky options work better. Balancing adhesion and flexibility ensures your stencil maintains sharp, precise lines, even after repeated use. Select your materials based on these factors to achieve durable, clean results every time.

Stencil Ease Stencil Adhesive Spray – Repositionable, Low-Tack Temporary Hold for Stencils & Templates, Clean Removal on Walls, Wood, Glass, Paper & Crafts (4.4oz)
Removable, Repositionable Adhesion: Spray on stencils, templates, posters, or artwork for temporary adhesion that peels away cleanly from…
As an affiliate, we earn on qualifying purchases.
As an affiliate, we earn on qualifying purchases.
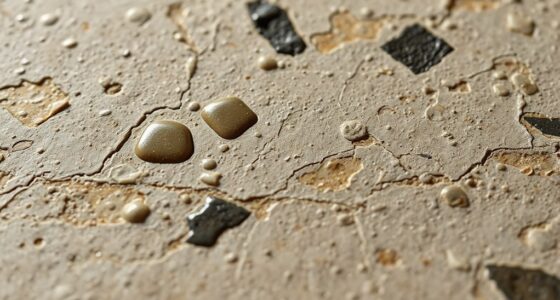
Preparing Your Surface for Precise, Crisp Stencils

A smooth, clean surface is essential for achieving crisp, precise stencils. Any surface texture or debris can cause the stencil design to bleed or distort, ruining fine lines. Before you start, thoroughly clean the surface with a gentle cleaner to remove dust, grease, or fingerprints. Sand rough areas to create an even surface, ensuring the surface texture is minimal. If needed, apply a primer or sealant to create a uniform base that helps the stencil adhere smoothly. Take your time to prepare the surface properly; this step is vital for sharp, clean lines. When the surface is ready, your stencil design will transfer cleanly, and your fine lines will stay sharp throughout the project. Proper preparation makes all the difference in professional-looking results.

Moon Roses 30 Pcs Miniature Detail Paint Brush Set, 3rd Generation Tiny Liner Brushes, 3 Sizes (0, 00, 000) Fine Tip Paint Brush for 40K Model Crafts, Watercolor Acrylics Oil & Nail Painting
【30-Piece Complete Detail Brush Set】Comes with 30 ultra-fine brushes in 3 precise sizes (#0, #00, #000), 10 brushes…
As an affiliate, we earn on qualifying purchases.
As an affiliate, we earn on qualifying purchases.
Applying Paint or Spray to Keep Fine Lines Sharp and Clear

To keep your fine lines sharp and clear, you need to use precise application techniques that prevent bleeding and smudging. Choosing high-quality paints or sprays makes a big difference in achieving crisp edges, while maintaining clean, sharp borders guarantees your design stays defined. By focusing on these points, you’ll enhance the longevity and clarity of your stencil work. Additionally, understanding stain removal techniques can help ensure that any accidental spills during the process won’t compromise your design.
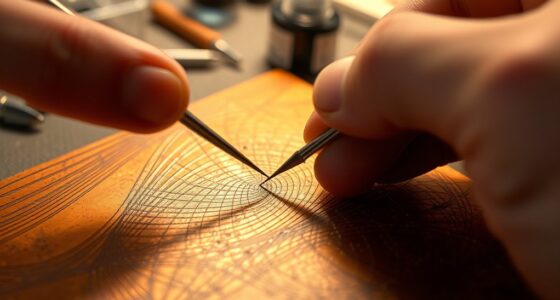
Use Precise Application Techniques
Using precise application techniques is vital for maintaining sharp, clear fine lines in your stencil work. When working on your stencil design, focus on controlled, deliberate movements to prevent bleeding or smudging. Use a steady hand and minimal paint or spray to keep lines crisp and defined. Applying paint or spray in thin, even layers helps preserve the intricate details and prevents excess buildup that can blur edges. For artistic effects, consider using tools like fine brushes or spray caps designed for detail work. Consistent, careful application guarantees your stencil’s fine lines stay sharp throughout the project. Mastering these techniques allows you to achieve professional-looking results, enhancing the overall quality and precision of your artistic expression.
Opt for Quality Paints or Sprays
Choosing the right paints or sprays makes a noticeable difference in how sharp and clear your fine lines stay. High-quality paints guarantee smooth application, reducing bleeding and smudging, which preserves your stencil’s detail. Using sprays with fine mist settings helps achieve even coverage, making color blending seamless without sacrificing crisp edges. Quality paints also dry quickly, so you avoid smudging your delicate lines. Proper stencil storage before use prevents warping, which can distort your fine lines. When you invest in top-tier products, your work appears more professional and durable. Plus, better paints and sprays reduce the need for touch-ups. Remember, consistent quality in your supplies keeps your project sharp from start to finish, giving your design that polished, clean look you want to achieve. Investing in high-quality gear not only enhances your results but also elevates your overall crafting experience. Additionally, understanding debt management can help you allocate funds effectively for quality materials, ensuring that your stencils remain effective over time, allowing for consistent application across multiple projects. Furthermore, utilizing airless spray techniques can significantly improve the precision of your application, ensuring that your fine lines maintain their integrity throughout the process. Moreover, selecting safety tips for using spray paints in a well-ventilated area is essential to protect your health while crafting.
Maintain Clean, Sharp Edges
Maintaining clean, sharp edges requires careful application techniques that prevent paint from bleeding into unwanted areas. To maintain your stencil design’s fine detail, use a steady hand and apply paint sparingly. Dabbing or using a small brush helps control the amount of paint and keeps edges crisp. If you’re spray painting, hold the nozzle at a consistent distance and use light, even coats. Taping down the stencil securely minimizes shifting, which can blur fine lines. Always work slowly and patiently, checking your progress regularly. Properly prepared surfaces and quality tools also contribute to sharp edges. By paying close attention to your application technique, you’ll ensure your stencil design stays clean, with fine lines that are clear and sharp, even after multiple runs.
Common Mistakes That Cause Smudges and How to Avoid Them
Smudges often happen when you rush or neglect proper technique, but understanding common mistakes can help you avoid them entirely. In stencil design, precision is key to preserving fine lines and showcasing your artistic expression. One frequent mistake is applying too much paint, which causes bleed and smudges. Another is moving the stencil before the paint dries, leading to blurred edges. Using a sponge or brush unevenly can also result in uneven coverage and smudges. To conclude, handling the stencil with dirty or greasy hands transfers unwanted marks. To prevent this, work slowly, use minimal paint, and keep your tools clean. Paying attention to these details ensures your stencil stays sharp and your artistic vision remains intact. Avoid these pitfalls to create crisp, professional results every time.
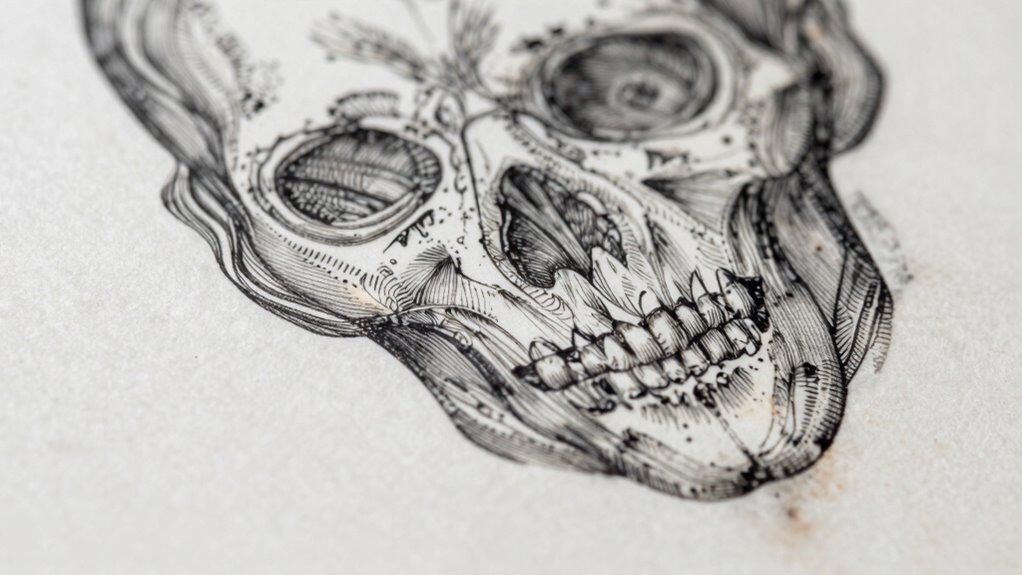
How to Repair and Touch Up Damaged Fine Lines in Your Stencil

Even with careful technique, accidents can happen, and your fine lines may get damaged or blurred over time. To repair and touch up these imperfections, start by evaluating the damaged area. Use a fine brush and matching ink or paint to carefully re-define the lines, ensuring you maintain the original design’s complexity. Focus on restoring the sharpness and detail, paying attention to color contrast to make the corrections blend seamlessly. Keep the design simple in the repair area to avoid overwhelming the original pattern. Use this visualization to guide your touch-up:
| Design Element | Repair Tip |
|---|---|
| Thin lines | Use a fine brush for precise correction |
| Color contrast | Match shades closely for seamless blending |
| Complex patterns | Simplify local areas to avoid clutter |
| Sharpness | Re-establish crisp edges for clarity |
Incorporating eco-friendly practices can also enhance the overall quality of your stencil work.
Testing and Practicing to Achieve Perfect, Durable Fine Lines

To achieve flawless, long-lasting fine lines, it’s essential to thoroughly test your tools and techniques before starting your main project. Practicing allows you to understand stencil symbolism—how each stroke influences the overall message—and channels your artistic inspiration effectively. Focus on consistency, pressure, and speed to refine your control, as proper tool maintenance can significantly impact performance.
Master your tools through practice to create flawless, enduring fine lines with confidence and artistic clarity.
- Feel the confidence that comes with mastering your tools, turning hesitation into precision.
- Experience the thrill of transforming blank surfaces into works of art, knowing your fine lines will endure.
- Embrace the challenge as a chance to push your skills, elevating your craftsmanship.
- Celebrate each successful test as a step closer to a masterpiece that captures your vision with durability and grace.
- Remember that detecting passive voice can enhance clarity in your writing, ensuring your artistic message is communicated effectively.
FAQs: Solving Your Top Fine Line Stencil Problems

After practicing your techniques and mastering your tools, you might still encounter common issues with fine line stencils that can compromise your final result. Challenges often stem from stencil patterns that are too intricate or the complexity of your design. To troubleshoot, consider the following:
| Problem | Solution | Tip |
|---|---|---|
| Bleeding or smudging | Use high-quality adhesive and minimal paint layers | Test on scrap before applying to your main project |
| Stencil lifting or shifting | Secure stencil firmly with painter’s tape | Work in a dust-free environment |
| Breakage of delicate lines | Choose thinner stencil material or digital designs | Keep your design simple for better durability |
| Inconsistent edges | Use steady hand and proper tools | Practice on scrap surfaces before final application |
Frequently Asked Questions
Can Different Paint Types Affect the Longevity of Fine Lines?
Different paint types definitely affect the longevity of fine lines. If you choose paints with the right consistency, your lines will stay sharp longer. On textured surfaces, thicker paints tend to hold better, while thinner ones might bleed or fade. So, consider the paint’s consistency and your surface texture carefully. Using the appropriate paint guarantees your fine lines remain crisp and last through time.
How Does Temperature Impact Stencil Application and Fine Line Durability?
Imagine trying to stick a sticker on a hot window—temperature effects can make or break your stencil’s adhesion. When it’s too hot or cold, adhesive performance suffers, causing fine lines to smudge or lift prematurely. Extreme temperatures can cause the stencil to warp or detach, compromising your design. To guarantee durability, apply your stencil in moderate conditions, so the adhesive stays strong and your fine lines stay sharp.
Are There Specific Stencil Designs That Are More Prone to Fine Line Failure?
Yes, certain stencil patterns with intricate design complexity are more prone to fine line failure. When you choose highly detailed stencil patterns, especially those with delicate, thin lines, you’re more likely to encounter issues with fine line durability. These intricate designs require extra care during application and removal, as the fragile lines can easily lift or tear, especially if the stencil material isn’t sturdy enough or if the adhesive isn’t strong enough.
What Tools Can Help in Achieving the Sharpest, Most Precise Fine Lines?
Think of your tools as a precision artist’s brush—small, sharp, and steady. Using fine-tipped craft knives and high-quality stencil materials helps you achieve crisp, sharp lines. For complex designs, a steady hand and a light touch are essential. Consider a scalpel for intricate details, and always opt for durable, flexible stencils. With these tools, even the most detailed designs will come out clean and precise, like a master’s touch.
How Long Should I Wait Between Stencil Layers for Optimal Results?
You should wait about 10-15 minutes between stencil layers to ensure proper drying and layer consistency. This pause allows the paint or medium to set, preventing smudging or bleeding, which is vital for sharp stencil techniques. Rushing this step can cause uneven edges and blurry fine lines. Be patient, and you’ll achieve cleaner, more precise results, making your stencil work look professional and polished.
Conclusion
Now that you know the secrets behind preserving your fine lines, imagine the stunning designs you’ll create—sharp, crisp, and lasting through every run. But beware: even the tiniest mistake could blur your masterpiece. Will your next project withstand the test of time, or will a small slip ruin it all? With the right tools and techniques, you’re on the edge of turning your stencil dreams into flawless reality—are you ready to take the leap?