
To create depth with layering and glazing, start by building a solid underpainting to define shapes and values. Apply transparent glazes gradually, blending warm and cool tones for realistic shadows and highlights. Vary surface textures using tools like palette knives or dry brushing to catch light differently and add dimension. Pay close attention to how textures interact with light and color, and be patient as you layer. Exploring these techniques further will reveal even more ways to enhance your work’s depth.
Key Takeaways
- Apply multiple translucent glaze layers gradually to build subtle color shifts and depth.
- Use blending techniques to merge warm and cool tones seamlessly for realistic shadows and highlights.
- Incorporate surface textures with varied brushstrokes or tools to enhance light interaction and spatial separation.
- Start with an underpainting to define basic shapes, then layer transparent glazes for richness and dimension.
- Observe how textures affect light and color blending, adjusting layers to emphasize three-dimensionality.

Creating depth in your artwork often hinges on mastering layering and glazing techniques. When you focus on these methods, you can transform flat, two-dimensional surfaces into rich, inviting spaces that draw viewers in. A key element in achieving this effect is understanding how to use color blending effectively. As you apply multiple layers of translucent paint or glaze, you can subtly shift hues and tones, creating a sense of volume and spatial separation. For instance, blending warm and cool shades seamlessly allows you to depict shadows and highlights more convincingly, giving your objects a three-dimensional feel. The more smoothly you blend your colors, the more natural and realistic your depth will appear. This isn’t about rushing the process but about gradually building up layers, allowing each to meld into the next, resulting in a nuanced color shift. Additionally, incorporating sound design techniques like layering and effects can similarly add depth and dimension to audio projects, emphasizing the importance of these methods across creative disciplines.
Surface texture plays a pivotal role in enhancing depth. When you vary the texture of your surface—perhaps by using different brushstrokes, tools, or mediums—you introduce tactile qualities that influence how light interacts with your painting. Rough textures can catch light differently than smooth areas, creating subtle contrasts that suggest depth and form. For example, you might stipple or scumble in certain areas to add visual interest and dimension, while keeping other parts more polished. These textured variations help to simulate the irregularities found in real-world surfaces, making the illusion of depth more convincing. As you layer glazes over textured areas, the surface’s tactile qualities influence how colors blend and how light plays across the painting, further reinforcing the sense of depth.
To effectively combine color blending and surface texture, you need patience and an observant eye. Start with a solid underpainting that establishes your basic shapes and values. Then, apply thin, transparent glazes, gradually building up color richness while paying attention to how the surface texture interacts with the layers. You might use a palette knife to create textured strokes in some sections or a dry brush technique to add roughness in others. Throughout this process, continually assess how the light hits different textures and how your color transitions work together to produce depth. The careful orchestration of blending and textural variation will give your artwork a compelling three-dimensional quality, engaging viewers and guiding their eye through the layered complexity of your piece.
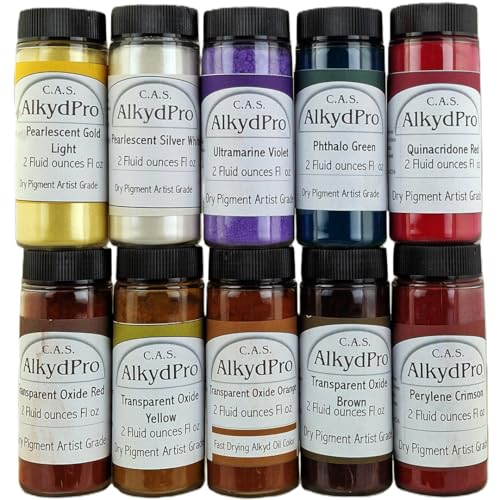
C.A.S. ALKYDPRO Transparent Glazing Pigment Set – High Chroma Transparent Oxide Orange (Quinacridone Burnt Orange Hue), , Perylene & Pearlescent Colors, 2 Fl Oz (Pack of 10), for Oil Paint, Alkyd, Acrylic & Watercolor, Dry Powder Artist Grade
Complete transparent glazing palette including Transparent Oxide Orange direct replacement for now extint Quinacridone Burnt Orange— 10 non-toxic…
As an affiliate, we earn on qualifying purchases.
As an affiliate, we earn on qualifying purchases.
Frequently Asked Questions
How Do Different Glazing Mediums Affect Depth and Texture?
Different glazing mediums influence depth and texture by affecting medium consistency and transparency effects. Thinner, more fluid mediums create subtle, luminous layers that add depth, while thicker mediums build texture and richness. Using transparent glazes enhances depth, as light passes through multiple layers, revealing underlying colors. You can experiment with different mediums to achieve varied textures and effects, making your artwork more dynamic and visually engaging.
Can Layering Techniques Be Used With Digital Painting Tools?
Did you know that over 70% of digital artists use layering techniques daily? Yes, you can definitely use layering techniques with digital painting tools. Digital layering allows you to build depth and texture seamlessly, much like traditional methods. You can apply digital glazing to create translucent effects and richness in your colors. Experiment with different layers and blending modes to enhance depth and achieve more realistic or vibrant artwork effortlessly.
What Are Common Mistakes to Avoid When Layering and Glazing?
When layering and glazing, avoid overworking the layers, which can make your artwork look muddy or overly busy. Also, neglecting color harmony can lead to a disjointed appearance. To keep your piece cohesive, build up gradually, maintain balance, and check color relationships regularly. Don’t rush the process, and remember that subtlety often creates the most realistic depth. This way, your painting stays vibrant and well-structured.
How Does Lighting Influence the Perception of Depth in Layered Artwork?
Did you know that proper lighting can make layered artwork appear 30% more three-dimensional? Lighting influences depth perception by creating shadow play and perspective tricks that enhance the illusion of space. When you position light carefully, shadows deepen the layers, guiding the viewer’s eye through the composition. Adjusting light angles can emphasize foreground details or push back background elements, making your layered work feel more realistic and enthralling.
Are There Specific Color Combinations That Enhance Depth Through Glazing?
You can enhance depth through glazing by using color combinations that emphasize contrast and harmony. Pair warm and cool hues with strong color contrast to make elements pop forward, while maintaining hue harmony in the background to create a sense of receding space. For instance, layering cool blues with warm oranges or reds can add vibrancy and depth, guiding the viewer’s eye through your artwork and making layered details stand out more vividly.

U.S. Art Supply Impasto Clear Acrylic Gel Medium (500ml Tub) – Layering & Extending Acrylic Paint
Premium Impasto Acrylic Gel Medium: Artist-quality clear gel acrylic medium in a 500ml tub, designed for creating dramatic…
As an affiliate, we earn on qualifying purchases.
As an affiliate, we earn on qualifying purchases.
Conclusion
So, you’ve learned how layering and glazing can add stunning depth to your work. Ironically, while these techniques seem simple, achieving that perfect sense of dimension often feels like chasing a ghost. You’ll spend hours building up layers, only to realize the real magic happens in the patience you didn’t know you had. But don’t worry—sometimes, it’s those elusive depths that make your art truly unforgettable, even if they seem just out of reach.

10PCS Palette Knife, Stainless Steel Painting Knife Set, Flexible Spatula Pallet Knife, Metal Artist Knives, Oil Painting Accessories Color Mixing Scraper for Oil, Canvas, Acrylic Painting By CUALORK
【RELIABLE QUALITY】This palette knife is sturdy and lightweight, blade made of stainless steel, it is resilience、flexible and anti-resistant;…
As an affiliate, we earn on qualifying purchases.
As an affiliate, we earn on qualifying purchases.

6 Different Sizes Dry Brush Set,Professional Art and Advanced Acrylic Paint Brushes,Detail Paint Brush Set for Model Wargames Miniature Watercolor Oil Painting (6)
The set includes dry brush miniature painting brushes in different 6 sizes to meet various painting needs
As an affiliate, we earn on qualifying purchases.
As an affiliate, we earn on qualifying purchases.