To fix the ‘mush’ effect and achieve clean edges, focus on applying ink evenly with a smooth brayer, using just the right amount—neither too thick nor too thin. Make sure your tools are clean to prevent residual ink from muddying the print. Practice controlled pressure during inking and avoid over-application, which causes ink to bleed. For more tips on mastering crisp relief prints, continue exploring proven inking techniques that elevate your work.
Key Takeaways
- Use a smooth, even roller to apply a thin, consistent ink layer for sharp, clean edges.
- Test ink thickness on scrap paper to prevent excess ink that causes blurring.
- Clean tools regularly to avoid residual ink buildup that softens print edges.
- Apply controlled, even pressure during inking and printing to prevent ink bleeding.
- Adjust paper texture and choose appropriate ink consistency to enhance edge sharpness.
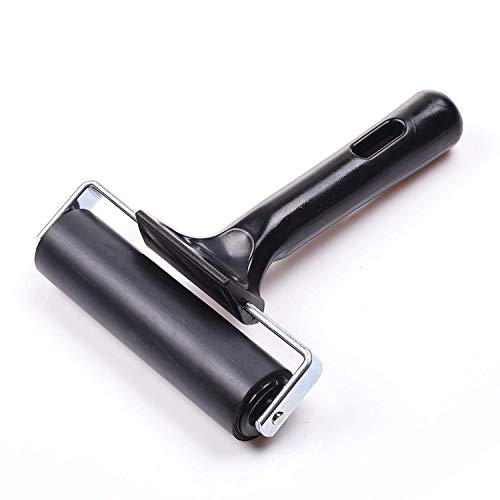
4-Inch Rubber Brayer Roller for Printmaking, Great for Gluing Application Also. (Original Version)
FEATURES: The drum is made of high quality rubber. It is durable and elastic. It can be well…
As an affiliate, we earn on qualifying purchases.
As an affiliate, we earn on qualifying purchases.
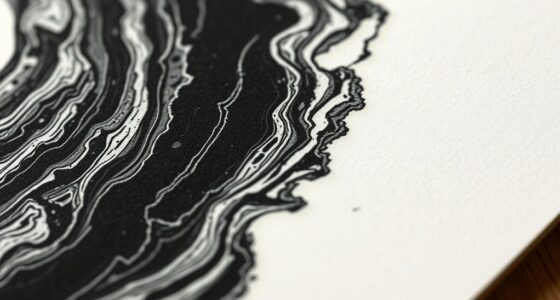
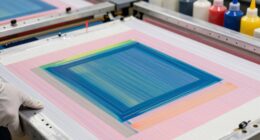
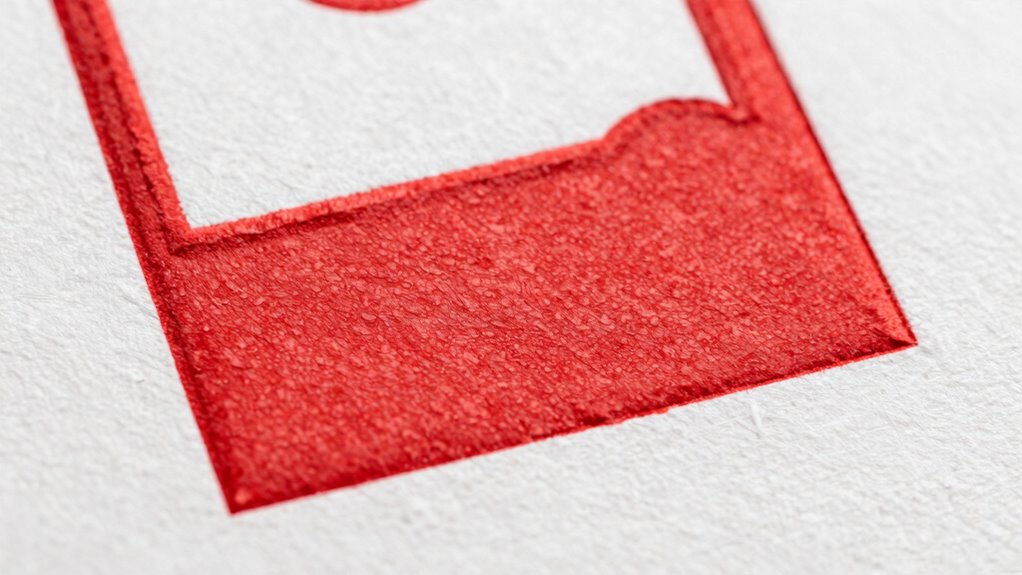
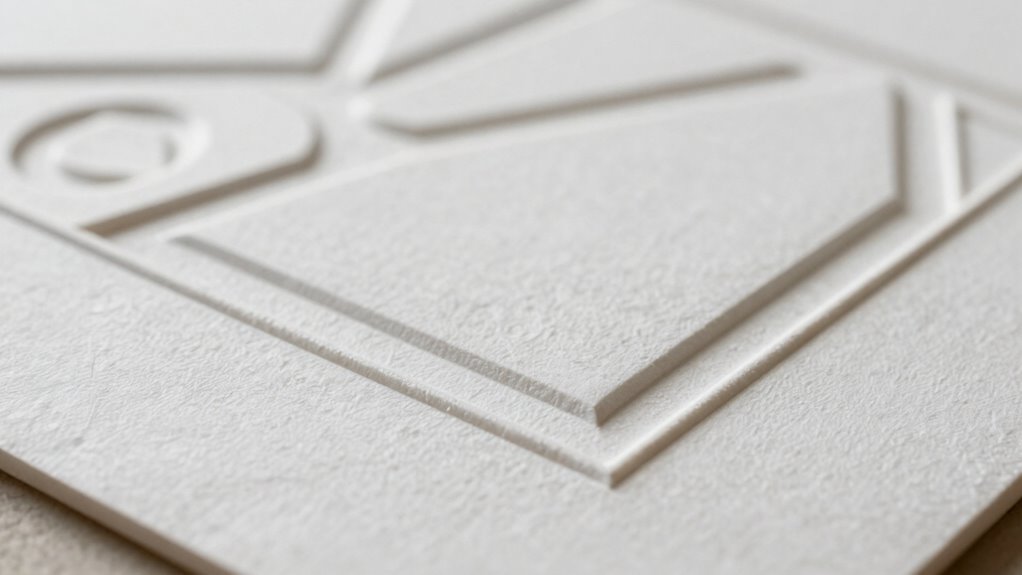
Why Relief Printing Edges Are Blurring and How to Fix Them
If your relief printing edges are blurring, it’s usually because the ink isn’t transferring cleanly from the block to the paper. This often happens when ink spreads into unwanted areas or when paper textures interfere with sharpness. To fix this, focus on controlling color blending; too much ink can cause smudging and soften edges. Using a minimal, even amount of ink helps maintain crisp lines. Additionally, consider the paper texture—rough or highly textured papers tend to absorb ink unevenly, causing blurring. Opt for smoother papers for sharper edges, as printmaking paper choices can significantly impact the quality of your prints. Clean your brayers thoroughly to prevent residual ink from muddying your print. By paying attention to ink application and paper choice, you’ll achieve cleaner edges and more precise relief prints. Exploring digital content formats can also enhance your understanding of how various techniques impact the clarity of your prints. Understanding the role of ink viscosity is crucial for mastering the relief printing process, as it directly influences ink transfer efficiency and overall print quality. Maintaining a consistent contrast ratio in your prints can also enhance the overall visual impact.

Speedball Professional Relief Ink Supergraphic Black 8OZ
DEVELOPED IN COOPERATION WITH AN ARTIST FOR ARTISTS – Created with world renowned relief artist, Bill Fick, the…
As an affiliate, we earn on qualifying purchases.
As an affiliate, we earn on qualifying purchases.
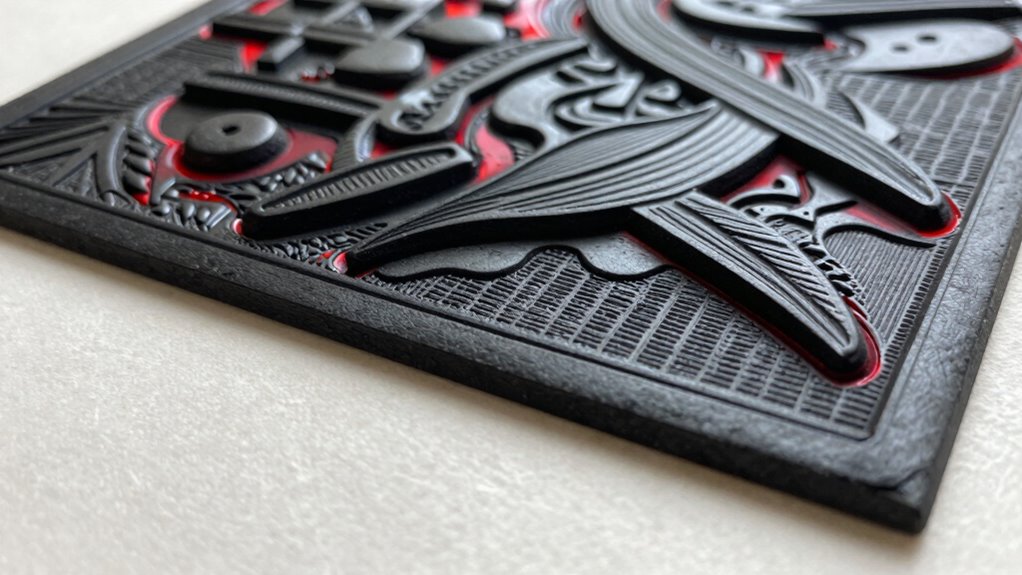
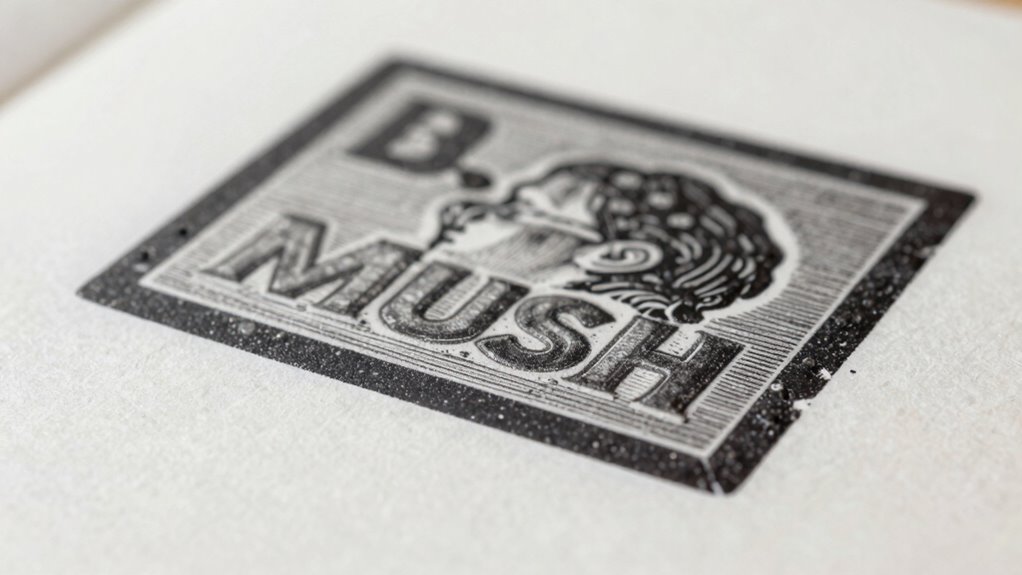
What Causes the ‘Mush’ Effect in Relief Printing
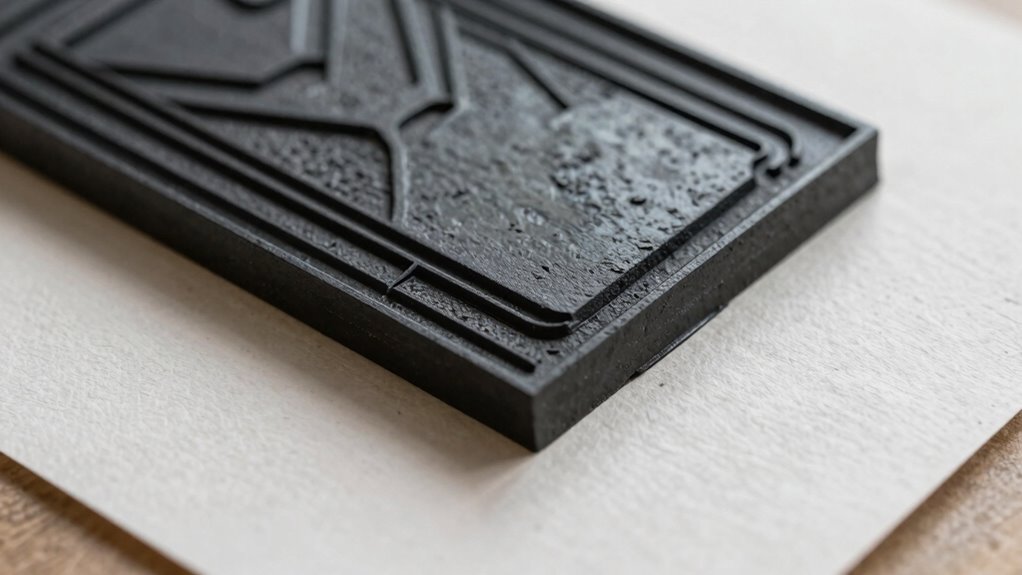
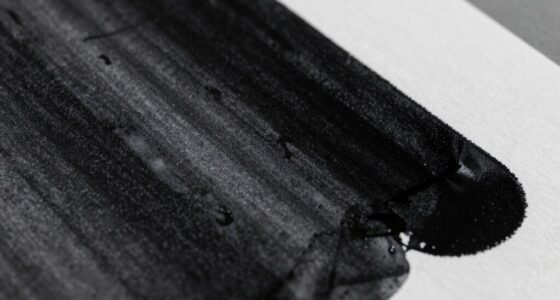
The ‘mush’ effect happens when your print looks blurry or smudged, often caused by excess ink buildup or uneven application. If you’re putting on too much ink, it can bleed into the paper and blur your details. Ensuring consistent ink distribution helps prevent this issue and results in sharper prints. Incorporating natural filtration systems can also help maintain clarity in your printing process by ensuring the materials used are free from contaminants. Additionally, understanding the importance of filter maintenance schedules is crucial for achieving optimal performance in your printing environment.
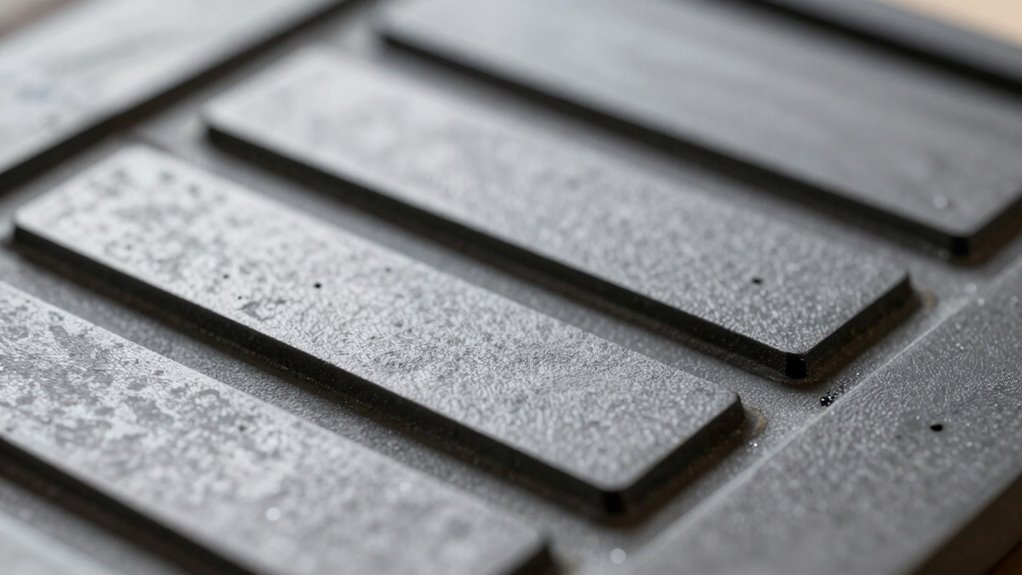
Excess Ink Buildup
Ever wonder why relief prints sometimes look blurry or overly smudged? Excess ink buildup is a common culprit. When you apply too much ink, it causes excessive ink transfer, resulting in blurred edges and a muddy appearance. This over-application can also affect the texture enhancement you’re aiming for, making the print look less sharp and more smeared. The surplus ink doesn’t settle evenly into the relief surface, leading to uneven distribution. As you press, the excess ink spreads beyond the intended image area, creating a “mush” effect. To prevent this, you need to control the amount of ink you apply and ensure it’s evenly spread. Properly managing ink buildup helps you achieve clean lines, crisp details, and a polished final print. Additionally, just like controlling ink is crucial in printing, understanding sound waves can significantly enhance your riding experience. Effective requirements traceability in software development can also help ensure that every aspect of a project meets the desired standards.
Inconsistent Ink Application
Applying ink unevenly is a common cause of the ‘mush’ effect in relief printing. When ink isn’t applied consistently, it can lead to color blending issues where the ink pools or spreads unpredictably. This uneven application becomes more noticeable on paper with varying textures, as rough surfaces tend to absorb ink differently than smooth ones, causing inconsistent coverage. If you don’t use a proper inking technique, the ink can create blurred edges or muddy details, resulting in a fuzzy image. To avoid this, make sure your ink layer is even and controlled. Use a brayer smoothly across the surface, and pay attention to how the paper’s texture interacts with the ink. Consistent application prevents the ‘mush’ and keeps your prints sharp and clear.

UCreate Printmaking Paper, White, 9" x 12", 100 Sheets
Ideal for beginning artists
As an affiliate, we earn on qualifying purchases.
As an affiliate, we earn on qualifying purchases.
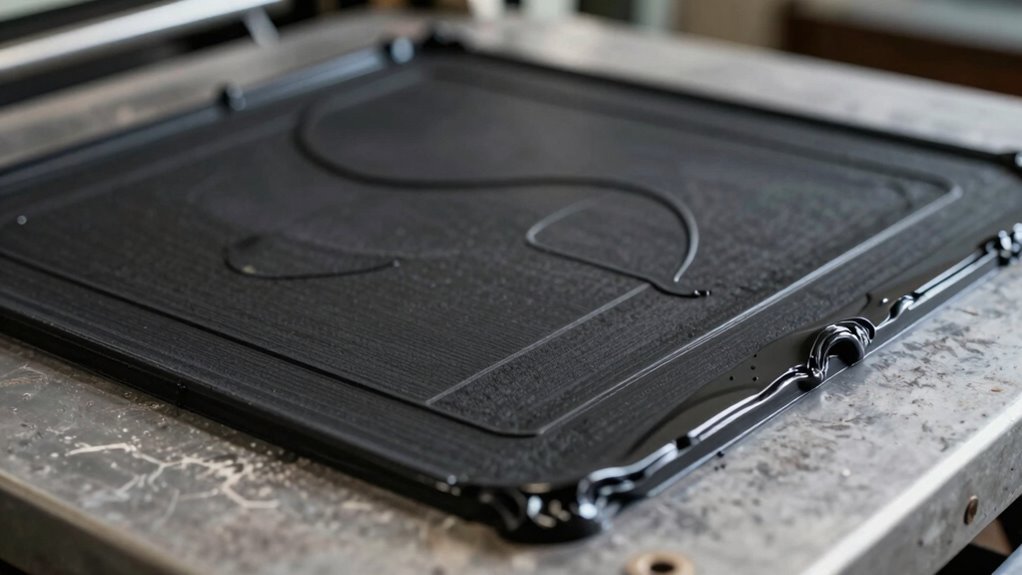
Preparing Your Ink and Palette for Sharp Relief Prints
To achieve sharp relief prints, you need to start with the right ink consistency, ensuring it’s neither too thick nor too thin. You should also prepare an even palette to prevent uneven inking, and take care to avoid ink contamination that can blur your design. Paying attention to these points will help you produce crisp, clean prints every time.
Selecting Correct Ink Consistency
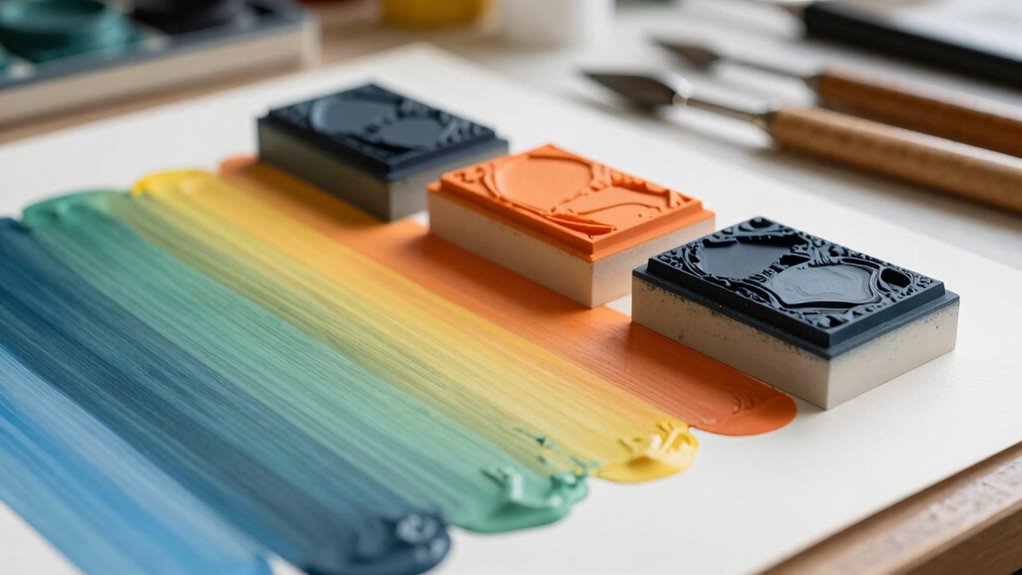
Have you ever struggled to get crisp, clean prints because your ink was too thick or too runny? Achieving the right ink consistency is key. If your ink is too thick, it won’t transfer smoothly, causing muddy edges. Too runny, and details may blur or fill in. To find the right balance, start by color mixing your ink to your desired hue, then adjust its consistency with small amounts of medium or solvent. Keep paper textures in mind—rougher papers may need slightly thicker ink for better coverage, while smoother surfaces require thinner ink for sharp lines. Test your ink on a scrap piece before printing your final edition. Consistent, well-balanced ink guarantees your relief prints will have clean edges and precise details every time.
Preparing an Even Palette
Ever wondered how to guarantee your relief prints come out crisp and consistent? The key is preparing an even palette. Start by color mixing thoroughly on your palette, ensuring no streaks or uneven patches. Achieving uniform ink helps produce sharp edges and clean lines. Pay attention to paper textures; smoother papers require less ink, while rougher textures may need a slightly wetter mix to transfer ink evenly. Use a palette knife or brush to blend colors and maintain a consistent consistency. Regularly check your ink’s appearance, looking for smooth coverage without streaks. An even palette minimizes variations during inking, preventing blurry or mushy prints. Proper preparation sets a solid foundation for clean, sharp relief prints every time.
Avoiding Ink Contamination
Contamination can ruin a relief print by mixing unwanted inks or debris into your palette, so it’s essential to keep your tools and workspace clean. Start with proper tool maintenance—clean your brushes, spatulas, and rollers regularly to prevent dried ink buildup. When preparing for color mixing, use separate palettes or well-cleaned mixing surfaces to avoid cross-contamination. Always wipe your tools thoroughly before switching colors, especially when changing from dark to light inks. Keeping your workspace free of dust and debris, which can transfer onto your print, is crucial for achieving professional results. Properly stored inks and tools prevent accidental contamination, ensuring sharp, clean edges in your relief prints. Staying vigilant with tool maintenance and workspace hygiene helps you maintain control over your ink and achieve the best possible results. Additionally, understanding the mechanics of French press coffee can enhance your appreciation for the precision required in both brewing and printing techniques. Maintaining water chemistry is equally vital in achieving optimal outcomes in both art and pool maintenance. Using high-quality workspace tools can further enhance your printing experience and help prevent issues like ink contamination.
4-Inch Rubber Brayer Roller for Printmaking, Great for Gluing Application Also. (Original Version)
FEATURES: The drum is made of high quality rubber. It is durable and elastic. It can be well…
As an affiliate, we earn on qualifying purchases.
As an affiliate, we earn on qualifying purchases.
How to Ink Relief Prints for Crisp, Clean Edges
To achieve crisp, clean edges in your relief prints, you need to focus on how you apply the ink. Start by choosing a roller that distributes ink evenly, ensuring proper color separation. Use a light touch to avoid over-inking, which can cause blurring or smudging. Pay attention to the paper texture; a smooth surface helps the ink stay sharp, while a rougher texture can cause edges to feather. Before printing, test your ink coverage on scrap paper to gauge the amount needed. When inking, roll in one direction with consistent pressure, avoiding excessive re-rolling that can build up ink and distort edges. Proper ink application combined with suitable paper texture results in crisp, clean relief prints with sharp edges. Additionally, consider using vinyl cutter settings to help determine the optimal pressure for your inking technique.
Common Inking Mistakes That Cause Blurry Edges
One common mistake that leads to blurry edges is applying too much ink or pressing too hard during inking, which causes excess ink to spread beyond the intended lines. This can result in uneven color blending and fuzzy outlines. To prevent this, keep these points in mind:
- Overloading your brayer or roller, leading to excessive ink that smears edges.
- Rushing the ink drying process, which causes smudging and feathering. Proper drying techniques are essential for achieving optimal print quality.
- Using inconsistent pressure, creating uneven ink application.
- Not cleaning your inking tools regularly, resulting in clumps or dried ink that disrupt sharpness.
These mistakes impact the clarity of your print, making edges appear blurry. Proper technique and patience ensure clean edges and crisp details, giving your relief prints a professional finish. Additionally, maintaining the right charger settings for your tools can help achieve optimal performance and prevent issues that lead to blurred edges.
Maintaining Consistent Ink Quality During Printing
Maintaining consistent ink quality throughout your printing session is essential for achieving uniform, professional results. To do this, regularly check and adjust your ink to guarantee proper color blending, avoiding uneven patches or dull tones. Keep your ink at a consistent thickness, which helps prevent variations in ink transfer and maintains sharp edges. Be mindful of the paper texture, as rough or uneven surfaces can absorb ink differently, affecting color consistency. Test print on a scrap piece before proceeding, and re-ink as needed to keep the ink smooth and uniform. Consistent ink quality minimizes the risk of mushy edges or color inconsistencies, ensuring your relief prints look sharp and polished from start to finish. Additionally, understanding Victorian steampunk fashion can inspire unique designs that enhance your prints. Implementing giveaways and engagement strategies can further attract attention to your work and broaden your audience.
Troubleshooting Persistent Smudges and Edges That Won’t Stay Sharp
Persistent smudges and fuzzy edges can be frustrating problems in relief printing, especially when they refuse to stay sharp despite your best efforts. To troubleshoot, start by inspecting your ink application—over-inking causes color blending issues that result in blurry edges. Next, examine your paper textures; rough surfaces can trap excess ink, leading to smudges. Then, check your inking method: uneven ink spread creates inconsistent edges. Finally, consider your press pressure—too much pressure can smear ink beyond the intended lines. Visualize:
Troubleshoot relief printing by checking ink application, paper texture, inking method, and press pressure for sharper, cleaner edges.
- A sponge-like paper surface holding excess ink.
- A roller applying uneven ink, causing blurry gradation.
- Fingerprints smudging the edges during handling.
- Ink bleeding into textured paper, softening sharp lines. Adjusting these factors helps sharpen edges and reduce unwanted smudges, giving your prints cleaner, crisper results.
Post-Inking Touch-Ups to Perfect Your Relief Prints
After you’ve completed the initial inking and pulled your print, small imperfections or inconsistencies may still be visible, but don’t worry—you can often fix these with targeted touch-ups. To improve your relief print, focus on refining details with careful color blending and adjusting for paper texture. Use a fine brush or cotton swab to apply ink or pigment to specific areas, enhancing sharpness and smoothing gradations. Consider the paper’s texture—rough or smooth—to guide your touch-up approach. Here’s a quick overview:
| Imperfection | Fixing Technique | Tips |
|---|---|---|
| Uneven edges | Lightly re-ink and retouch | Use a steady hand |
| Faded details | Add small color accents | Match original hues |
| Blurred lines | Sharpen with fine brush strokes | Follow original lines |
These steps help achieve crisp, clean relief prints. Additionally, it’s essential to detect passive voice in your writing to ensure clarity and engagement.
Frequently Asked Questions
What Types of Ink Are Best for Sharp Relief Edges?
You should use oil-based or fast-drying inks for sharp relief edges. These inks have lower absorption rates, which help maintain crisp lines, and they dry quickly, reducing smudging. Water-based inks tend to absorb more into the paper, causing fuzzy edges, so they’re less ideal. Opting for inks with consistent viscosity also guarantees even application, resulting in clean, sharp relief edges every time.
How Does Paper Quality Affect Relief Printing Clarity?
Think of paper as the stage for your print—its quality can make or break your art. Smooth, high-quality paper with a tight texture guarantees crisp, clean edges because it absorbs ink uniformly. If your paper is too rough or porous, ink spreads unevenly, causing blurry or mushy edges. Choosing the right paper helps your relief printing stay sharp, making your design stand out with clarity and precision.
Can Temperature or Humidity Influence Inking Results?
Yes, temperature effects and humidity influence your inking results. High temperatures can cause the ink to dry too quickly, leading to uneven application or ‘mush.’ Conversely, low temperatures slow down drying, risking smudging. Humidity influences ink consistency — high humidity makes ink more fluid, while low humidity thickens it. Keeping your workspace stable helps you achieve consistent, sharp edges and clean relief prints every time.
Is There a Recommended Drying Time for Optimal Edge Crispness?
You should wait at least 10 to 15 minutes for the ink to dry completely, ensuring crisp edges. Drying speed depends on ink viscosity and environmental factors like humidity. Thinner ink dries faster, while thicker ink needs more time. To achieve best edge crispness, avoid handling the print prematurely, and consider using a fan or gentle heat to accelerate drying, but don’t rush it to prevent smudging.
How Often Should I Clean My Brayers and Tools During Printing?
You should clean your brayers and tools frequently during printing, ideally after every few prints or when switching colors. Regular cleaning guarantees ideal inking and prevents ink buildup, which can cause smudging or uneven edges. Proper tool maintenance keeps your equipment in top condition, resulting in cleaner, sharper prints. Don’t wait until ink dries; quick cleanings help maintain consistent quality and extend the lifespan of your tools.
Conclusion
To achieve sharp, clean edges in relief printing, you need to prepare your ink, apply it carefully, and stay attentive throughout the process. Keep your ink consistent, avoid common mistakes, and troubleshoot issues promptly. By maintaining focus, adjusting techniques, and making precise touch-ups, you’ll guarantee your prints are crisp, clear, and professional-looking. Consistent effort, mindful inking, and diligent maintenance are your keys to perfect relief prints every time.