When photographing art for documentation and conservation, focus on even, diffused lighting at a 45-degree angle to minimize glare and reflections. Use daylight-balanced bulbs for color accuracy and consider calibration tools to guarantee true-to-life hues. Capture images in high-resolution formats like TIFF or RAW, and organize your files carefully. Store physical artworks in acid-free materials in controlled environments. Mastering these techniques ensures your images are precise and long-lasting—keep going to learn more about each essential step.
Key Takeaways
- Employ even, soft, diffused lighting at 45-degree angles to minimize glare and shadows, ensuring accurate color and detail capture.
- Use high-resolution formats like TIFF or RAW for digital storage and organize files systematically for easy access and preservation.
- Calibrate cameras and lighting setups regularly to maintain true color fidelity and consistent documentation over time.
- Control physical conditions—store prints in acid-free materials and in stable environments away from light, humidity, and temperature fluctuations.
- Adjust lighting techniques to reduce surface reflections and glare, especially on glossy or varnished artworks, for accurate photographic documentation.
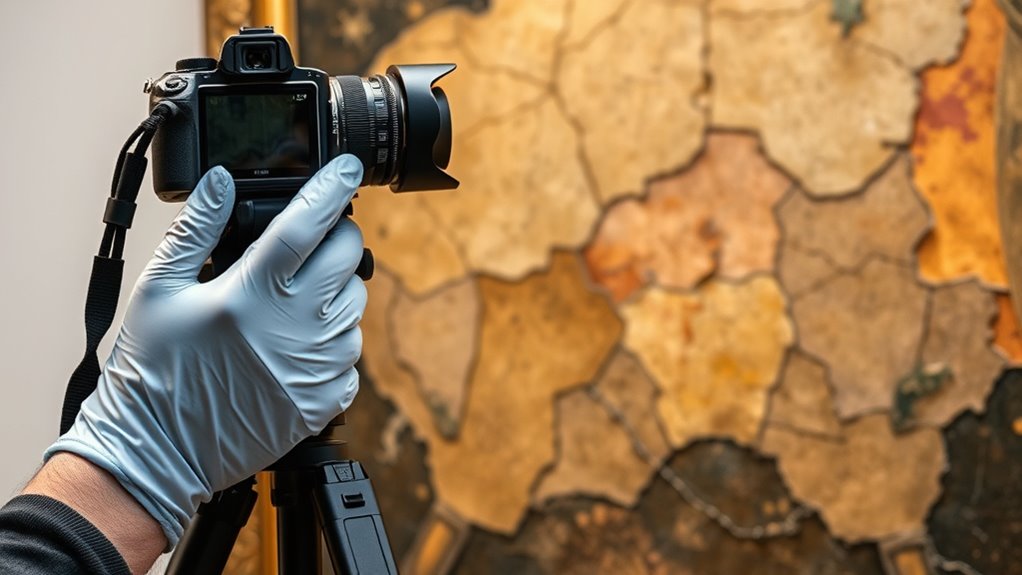
Have you ever tried photographing a piece of art and found the results less than satisfying? It’s a common frustration, but understanding some key principles can make a significant difference. When documenting artwork, lighting techniques are essential. You need to illuminate the piece evenly, avoiding harsh shadows or reflections that distort its appearance. Soft, diffused light is often your best option, as it reveals details without creating glare. Using a light source with adjustable intensity allows you to fine-tune the illumination to match the artwork’s unique features. Positioning your lights at a 45-degree angle to the piece helps minimize reflections, especially on glossy surfaces like varnished paintings or glass frames. Avoid direct overhead lighting, which can cast unflattering shadows or cause hotspots. Additionally, consider using daylight-balanced bulbs to simulate natural light, ensuring the colors in your photographs stay true to the original artwork. Proper color calibration also plays a crucial role in capturing accurate hues and shades.
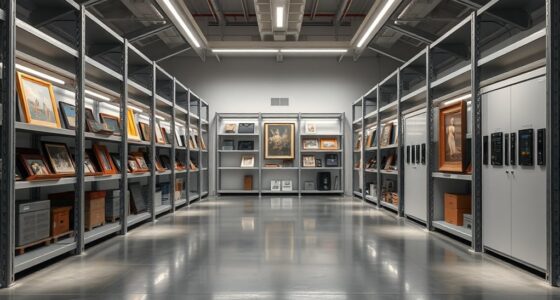
Once you’ve captured a high-quality image, it’s equally important to think about long-term preservation. Archival storage becomes a key concern, especially if you want your photographs to serve as reliable records over time. Store digital files in a secure, organized manner—using high-resolution formats like TIFF or RAW ensures the images retain all their detail. Back up your files regularly, preferably in multiple physical locations or cloud storage, to prevent loss from hardware failure or accidental deletion. For physical photographs or prints, archival storage involves using acid-free folders, sleeves, and storage boxes. Keep these materials in a controlled environment—away from direct sunlight, high humidity, and temperature fluctuations—to prevent deterioration. Proper storage not only preserves the physical condition but also maintains the integrity of your digital records, which are essential for future reference, restoration, or conservation efforts.
In essence, photographing art for documentation and conservation isn’t just about snapping a picture; it’s about precision and foresight. Mastering lighting techniques ensures that your images accurately represent the artwork’s colors and textures, while good archival storage practices safeguard your images for decades to come. Combining these elements allows you to create a trustworthy record that can support conservation efforts, scholarly research, or even insurance claims. Paying attention to detail in these areas transforms casual photography into a valuable tool for preserving cultural heritage. Whether you’re a professional conservator or an enthusiastic collector, understanding and applying these principles will make your documentation efforts more effective and enduring.
Top picks for "photograph documentation conservation"
Open Amazon search results for this keyword.
As an affiliate, we earn on qualifying purchases.
Frequently Asked Questions
What Equipment Is Best for High-Resolution Art Photography?
You should use a high-resolution digital camera with excellent sensor quality for detailed captures. Opt for a macro or prime lens with a fixed focal length to guarantee sharpness and accurate color reproduction. Use camera stabilization, like a tripod or remote shutter release, to prevent blur. Carefully select your lens based on the artwork’s size and detail, and consider a tilt-shift lens for precise control over perspective and distortion.
How Do Lighting Conditions Affect Art Documentation Quality?
Think of lighting as the brushstroke that reveals every detail. It directly impacts your art documentation quality; inconsistent lighting causes shadows and color shifts, reducing clarity. You need lighting consistency, whether using natural or artificial light, to guarantee accurate color and texture capture. Natural light offers warmth but varies throughout the day, while artificial light provides control. Choosing the right setup helps preserve the artwork’s integrity and detail.
What Are the Best Practices for Photographing Fragile Artworks?
When photographing fragile artworks, handle delicate surfaces with care by using gloves and gentle support to prevent physical damage. Use a stable tripod and avoid direct contact with the piece. Keep lighting soft and diffused to prevent heat or light damage. Always support the artwork properly during setup, and work slowly to minimize stress. Following these best practices helps preserve the integrity of the artwork while capturing quality images.
How Can I Ensure Color Accuracy in Art Photographs?
Ensuring color accuracy is like aiming for a perfect shot; it starts with proper color calibration. You should regularly calibrate your monitor using professional profiling tools to keep colors true to life. When shooting, use the correct white balance settings. Additionally, view your images on calibrated monitors and compare them with physical artwork under consistent lighting to maintain true color reproduction in your photographs.
What Post-Processing Techniques Are Recommended for Art Images?
You should start with precise color correction to guarantee the image matches the artwork’s true hues. Use software tools to adjust brightness, contrast, and white balance carefully. Apply noise reduction to remove grain without sacrificing detail. Always work on a duplicate layer, and compare your edits to the original to maintain accuracy. These techniques help produce a faithful, high-quality digital record of the artwork for documentation and conservation.
Conclusion
So, next time you’re snapping a picture of a priceless masterpiece, remember: your camera is basically its guardian angel, ensuring it’ll survive centuries of neglect and selfie obsession. With a few careful shots, you’re not just documenting art—you’re saving history from the perils of time, neglect, and Instagram filters. Who knew that wielding a camera could make you a hero in the world of art conservation? Smile for the future, and don’t forget to focus!