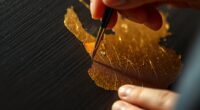
In subtractive drawing, you start with a dark, heavily shaded surface and erase specific areas to bring out light, details, and contrast. By carefully removing material with erasers and fine tools, you create highlights and depth that give your artwork a luminous quality. This technique relies on your control and precision to reveal intricate textures and form. If you keep exploring, you’ll discover how mastering erasing techniques can transform your artwork into striking, realistic images.
Key Takeaways
- Subtractive drawing involves starting with a dark surface and removing material to reveal highlights and light areas.
- Erasing tools like kneaded rubber and fine-tipped erasers are used for precise light effects.
- The technique emphasizes contrast by selectively erasing to create depth, texture, and luminous highlights.
- Historically rooted in chiaroscuro practices, it relies on controlled removal to craft realistic images.
- Modern artists often combine subtractive methods with digital tools to enhance light and shadow effects.
Have you ever wondered how artists create striking images by removing material rather than adding it? Subtractive drawing is a fascinating technique that centers around erasing to reveal light and form. Instead of building up layers of graphite or charcoal, you start with a dark, dense surface—like a heavily shaded paper or a coated material—and then carefully erase to carve out your image. This approach emphasizes contrast and precision, allowing you to craft delicate highlights and intricate details by selectively removing material. Artists often choose high-contrast images to maximize the visual impact of their erased highlights. To understand the techniques overview, it’s helpful to see how subtractive drawing differs from traditional methods. You typically begin with a dark background or a fully shaded surface. Using tools like erasers, kneaded rubber, or even fine-tipped erasers, you gently lift the medium from specific areas. The process involves a controlled balance: you erase more in some spots to create highlights, while leaving darker areas untouched to add depth. This technique demands patience and a steady hand but offers a unique way to express light and shadow dynamically. Artists often use soft, blending erasers for broad areas and sharper tools for detailed highlights, giving the image a luminous quality. The focus is on precision—knowing exactly where to erase to bring out the form, texture, and mood of the subject.
Looking into its historical development, subtractive drawing has roots stretching back centuries. Historically, artists such as chiaroscuro masters employed similar principles, working with light and dark to create three-dimensional effects. In the 15th and 16th centuries, the Renaissance saw artists like Leonardo da Vinci and Michelangelo experimenting with chiaroscuro and sfumato techniques that involved subtractive methods—blending and erasing to achieve subtle gradations of tone. Moving forward to the 19th and 20th centuries, artists like Pablo Picasso and Georges Seurat incorporated subtractive techniques into their work, often using erasers and other tools to refine their images. The technique gained popularity as a way to achieve detailed realism and luminous effects, especially in portraiture and botanical illustrations. Today, subtractive drawing continues to evolve, blending traditional methods with modern tools like digital erasers and software, yet its core principle remains rooted in the age-old practice of lightening a dark surface to reveal form.
In essence, subtractive drawing is a powerful, elegant approach that allows you to craft images by removing material, emphasizing light, contrast, and subtlety. Its rich history and versatile techniques make it a timeless method for artists seeking to explore the interplay between darkness and light.
kneaded rubber eraser for artists
As an affiliate, we earn on qualifying purchases.
As an affiliate, we earn on qualifying purchases.
Frequently Asked Questions
What Are the Best Tools for Subtractive Drawing?
The best tools for subtractive drawing include charcoal tools like soft and vine charcoal, which let you easily create and erase light areas. Use kneaded erasers for precise erasing and blending stumps for smooth *progressions*. Incorporate erasing techniques to lift off charcoal and reveal highlights. These tools and techniques help you control values, add depth, and create striking light effects in your drawings.
How Do I Choose the Right Surface for Subtractive Techniques?
Think of your surface like a blank canvas waiting for your touch; choose one with a smooth texture for clean erasing and fine detail. Consider color too—light-colored surfaces like toned paper can add depth, while darker ones create contrast. You want a surface that supports your style and technique, much like a stage that complements your performance. Pick wisely, and your subtractive work will truly shine.
Can Subtractive Drawing Be Combined With Other Art Methods?
Yes, you can definitely combine subtractive drawing with other art methods. You might blend techniques like shading, hatching, or stippling, then erase to create highlights or light effects. Mixing media, such as adding watercolor or ink, enhances your work and gives it depth. Experiment with mixed media integration to discover unique textures and contrasts, allowing your subtractive techniques to complement and elevate your overall art piece.
How Do I Fix Mistakes Made by Erasing?
If you make a mistake when erasing, don’t worry. Use your erase techniques carefully to correct it, like gently dabbing or light erasing for subtle adjustments. For larger errors, try correction methods such as layering with darker tones or re-adding details around the mistake. You can also blend or smudge areas to smooth out corrections, ensuring your drawing looks intentional and polished.
What Are Common Challenges Beginners Face in Subtractive Drawing?
Think of subtractive drawing as sculpting with light and shadow. You might stumble over common misconceptions, like thinking erasing is just for corrections, or that technique misconceptions mean you need fancy tools. Beginners often struggle with controlling erasing pressure and timing, leading to uneven light areas. Practice patience and develop a steady hand, understanding that erasing is an active part of your art, not just a fix.
fine tip erasers for drawing
As an affiliate, we earn on qualifying purchases.
As an affiliate, we earn on qualifying purchases.
Conclusion
As you master subtractive drawing, remember that it’s like sculpting with light and shadow, revealing your artwork’s true form by carefully erasing. With each gentle removal, you’re carving out the brilliance that was hidden beneath the surface, turning a blank space into a luminous masterpiece. Embrace the process, and watch your skills grow brighter than ever, for in subtractive art, your eraser becomes a magic wand, transforming darkness into radiant beauty.
charcoal and graphite eraser set
As an affiliate, we earn on qualifying purchases.
As an affiliate, we earn on qualifying purchases.
subtractive drawing tools
As an affiliate, we earn on qualifying purchases.
As an affiliate, we earn on qualifying purchases.