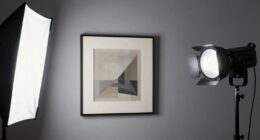
To avoid flat-looking textured paintings, position your lights at about 30 degrees from the surface, preferably at low or side angles, to cast shadows that enhance surface details. Use adjustable, diffused lighting to control brightness and color temperature, making textures pop and colors vibrant. Avoid overhead or harsh direct light, as it flattens textures. Experiment with angles and shadow play to create depth. If you want to perfect your display, there’s more to discover below.
Key Takeaways
- Position lights at about 30 degrees from the surface to create shadows that highlight textures and depth.
- Use side or low-angle lighting to emphasize surface variations and prevent flattening.
- Employ adjustable, diffused, or dimmable lighting to control shadow intensity and surface detail visibility.
- Incorporate shadows and highlights strategically to define form and enhance tactile qualities.
- Avoid direct overhead lighting; instead, experiment with angles to boost color contrast and surface dimension.

Hard-Wired Picture Lights 23.62 Inch Dimmable LED Wall Art Lighting Modern Brass Gallery Light Poster Lights Adjustable Swing Arm Picture Frame Light For Display Art Work,14W,2700K, Warm White
Dimmable Picture Lights: The gallery art light for paintings is dimmable with 10%-100% dimming range. The lights for…
As an affiliate, we earn on qualifying purchases.
As an affiliate, we earn on qualifying purchases.
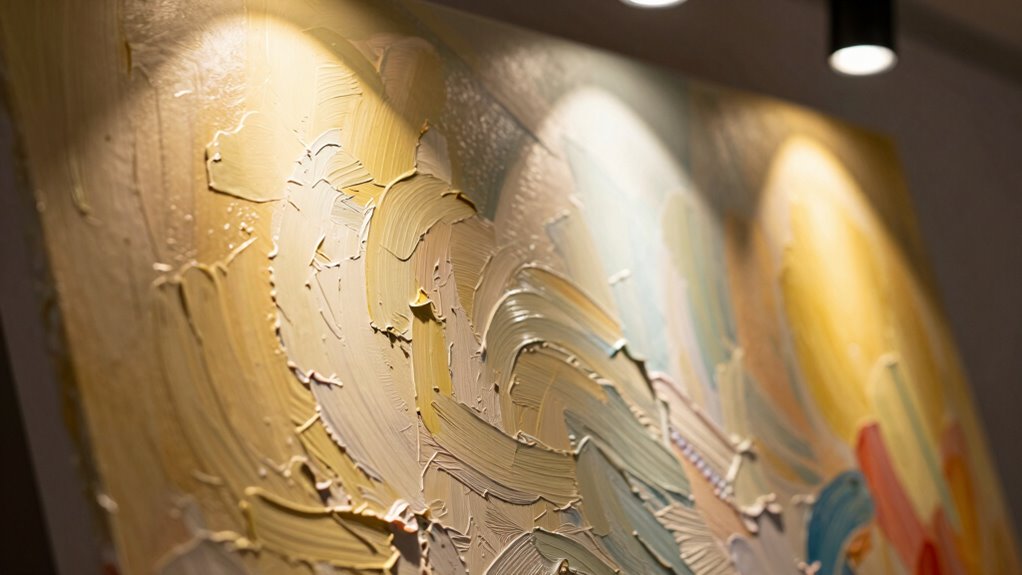
Why Proper Lighting Makes Textured Paintings Pop
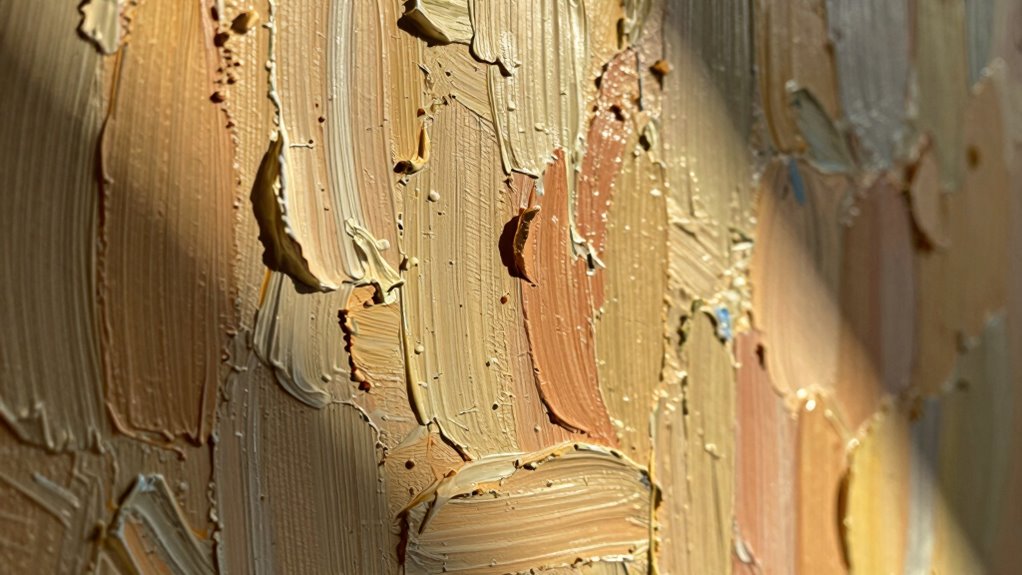
Proper lighting is essential because it highlights the texture and depth of your painted surfaces, making them stand out. In an art gallery, lighting techniques are carefully chosen to enhance each piece’s unique qualities, and the same applies to your textured paintings. Well-placed lighting creates shadows and highlights that emphasize brushstrokes, impasto, or other textural elements. This interplay of light and shadow draws viewers in, making the artwork appear more dynamic and engaging. When you understand how to use lighting effectively, your textured paintings won’t look flat or dull. Instead, they’ll come alive, capturing attention and inviting close inspection. By applying professional lighting techniques, you guarantee your artwork’s textures are showcased to their fullest potential. Additionally, using high contrast ratios in your lighting setup can further enhance the three-dimensional appearance of your textures. Furthermore, the principles of color palettes can also influence how light interacts with the surface, enhancing the overall visual impact. Understanding digital concepts in lighting design can also provide innovative ways to enhance the viewing experience. Incorporating Victorian lighting styles can add an extra layer of sophistication and drama to your textured paintings. Moreover, utilizing soft lighting techniques can create a gentle glow that enriches the textures and adds warmth to the overall presentation.

VANoopee 5-Color 6-Light LED Track Lighting Kit with 6.6FT H Type Track Lighting Rail, LED Track Light Heads Dimmable Modern Kitchen Track Lighting Fixtures Ceiling Spotlight, CRI90+ 10W 800lm Black
🌈 5 Color Temperature Selectable➤Customize your lighting experience with innovative 5CCT H track light heads. Easily adjust the…
As an affiliate, we earn on qualifying purchases.
As an affiliate, we earn on qualifying purchases.
What’s the Best Angle to Light Your Textured Artwork?
The angle at which you light your textured artwork can dramatically influence how its surface details are perceived. To enhance color contrast and make textures stand out, position your light source at a low or side angle, approximately 30 degrees from the artwork’s surface. This creates shadows that highlight raised areas, emphasizing depth and intricacy. Adjusting the light angle also helps in framing enhancement, drawing attention to the artwork’s edges and framing details. Avoid placing lights directly overhead, which can flatten the surface and diminish the sense of texture. Incorporating skin care tips can also enhance the viewing experience by adding dynamic visual interest. Additionally, using car protection products can ensure that your artwork remains safe from environmental damage while maintaining its vibrant appearance. Understanding the importance of mythology-inspired names can also add an intriguing narrative to your artwork, enriching the viewer’s experience. Moreover, the use of appropriate flywheel upgrades can enhance the overall performance of your creative process by ensuring efficiency and precision. Experimenting with different angles will help you find the most effective position to showcase the artwork’s depth, ensuring textures pop and colors come alive without flattening the overall visual impact.

BIGLIGHT Spotlight Battery Operated, LED Puck Light, Dimmable Uplight with Remote, Stick on Accent Light for Painting Picture Wall Artwork Photo Portrait Closet Plants, Warm White, 2 Pack
[MULTI DIRECTIONAL LIGHTING HEAD] – The picture light's head can swivel up and down, left to right, perfectly…
As an affiliate, we earn on qualifying purchases.
As an affiliate, we earn on qualifying purchases.
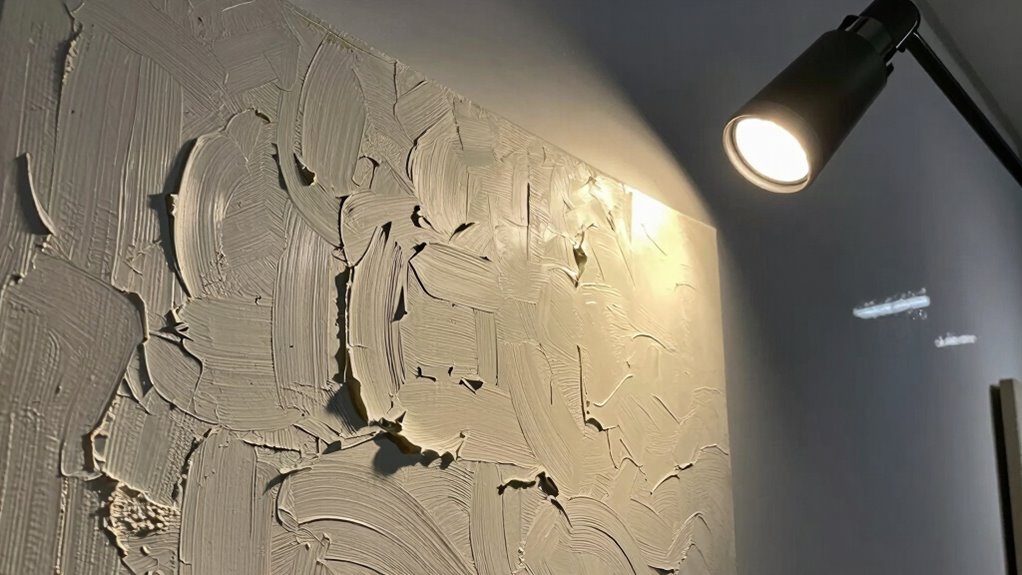
How to Position Lights for Maximum Texture Effect
Positioning your lights correctly can make a significant difference in highlighting the textured details of your artwork. To maximize the texture effect, focus on lighting direction—placing lights at a low angle or slightly off-center creates shadows that enhance surface details. Adjust the lighting to emphasize areas with high color contrast, which adds depth and visual interest. Experiment with side lighting to cast shadows that accentuate the texture, making it pop without flattening the painting. Avoid direct, harsh overhead lights that wash out shadows. Instead, opt for angled lighting that reveals the textured surface’s nuances. Proper positioning directs attention to the artwork’s depth, giving viewers a richer, more dynamic experience of the painted surface. Additionally, just as with cycling skills, mastering the art of light positioning requires practice and experimentation for optimal results.

Rechargeable Picture Light for Wall Art White – 3 Color Temperatures,Remote Control & Adjustable Angle Wall Mount Battery Operated Wall Light for Paintings,Gallery,Frames,Photos (13H Runtime, 350LM)
【3 Adjustable Color Modes & Wireless Control】Customize your art display with 3 color temperatures (3000K warm/4000K neutral/6500K cool…
As an affiliate, we earn on qualifying purchases.
As an affiliate, we earn on qualifying purchases.
Choosing the Right Lighting Type for Textured Paintings
Choosing the Right Lighting Type for Textured Paintings
Choosing the right lighting type is essential for highlighting the texture of your paintings. You should focus on selecting lights that can be adjusted for ideal angles and intensity to bring out the details. Incorporating outdoor ovens can inspire the creative use of light and shadow in your art. Balancing light intensity ensures your artwork is well-lit without glare or shadows that obscure the texture. Additionally, consider the watt-hours of your lighting setup, as this can impact the overall effectiveness in showcasing the dimensionality of your work. Using proper safety precautions when handling lighting equipment is crucial to prevent accidents while enhancing your art. Remember, the use of effective copywriting techniques can also help convey the emotional depth of your pieces, making the lighting even more impactful.
Optimal Light Angles
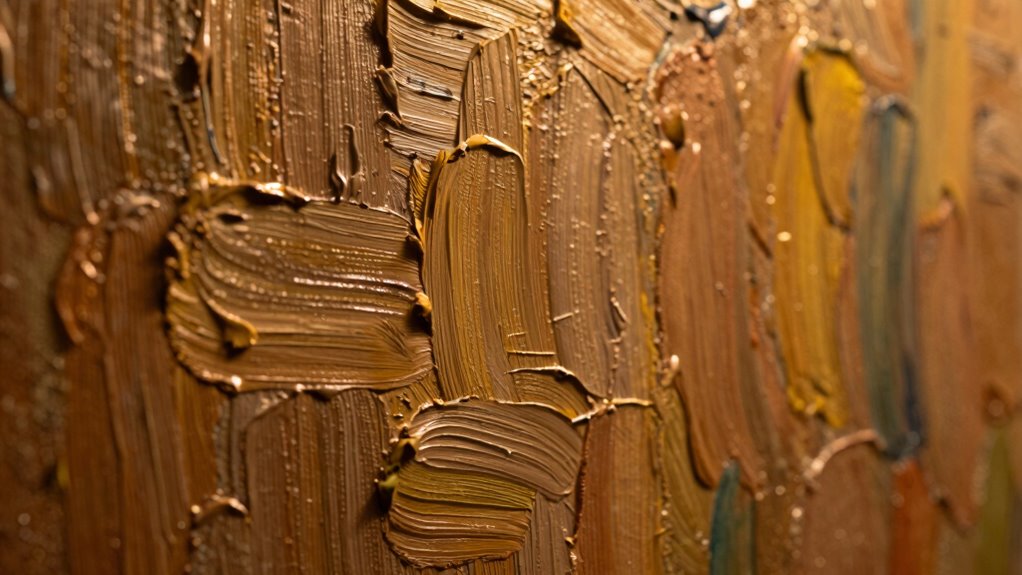
Have you ever noticed how the angle of light dramatically changes the way textured paintings look? To maximize their depth, position your light source at a low or side angle, creating shadows that emphasize the texture. This approach boosts color contrast, making hues more vivid and distinct. Avoid direct, overhead lighting, which can flatten features and diminish the painting’s dimensionality. Instead, experiment with different angles until you find one that highlights the textured surface without washing out details. Properly angled lighting not only enhances the texture but also brings out subtle color variations, adding richness and visual interest. Remember, the right light angle is key to making your textured paintings pop and come alive on the wall.
Light Intensity Balance
Ever wonder how the right light intensity can make textured paintings truly stand out? Achieving the perfect balance enhances color contrast and highlights surface details without creating harsh shadows. Too bright, and the texture may appear flat or washed out; too dim, and the details get lost. To optimize, consider these ideas:
- Use diffused lighting to soften shadows and improve light diffusion, revealing texture without glare.
- Adjust light intensity to emphasize color contrast, making hues pop without overwhelming.
- Incorporate multiple light sources at different angles to create depth and dimension.
Balancing light intensity guarantees your painting’s texture isn’t flattened but instead gains vibrancy and depth, inviting viewers to explore every detail. The goal is to enhance, not overwhelm, so experiment with these strategies for the best results.
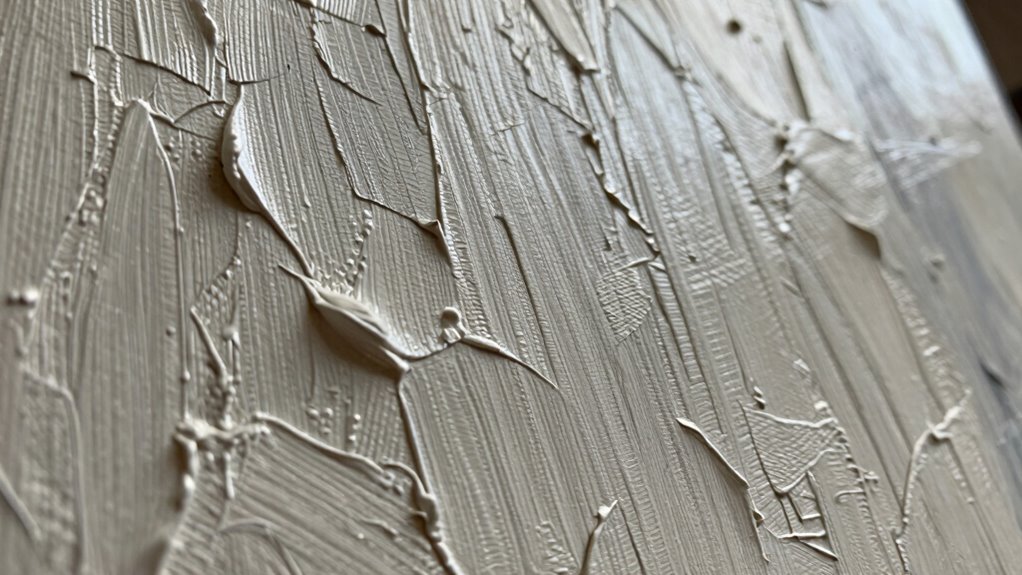
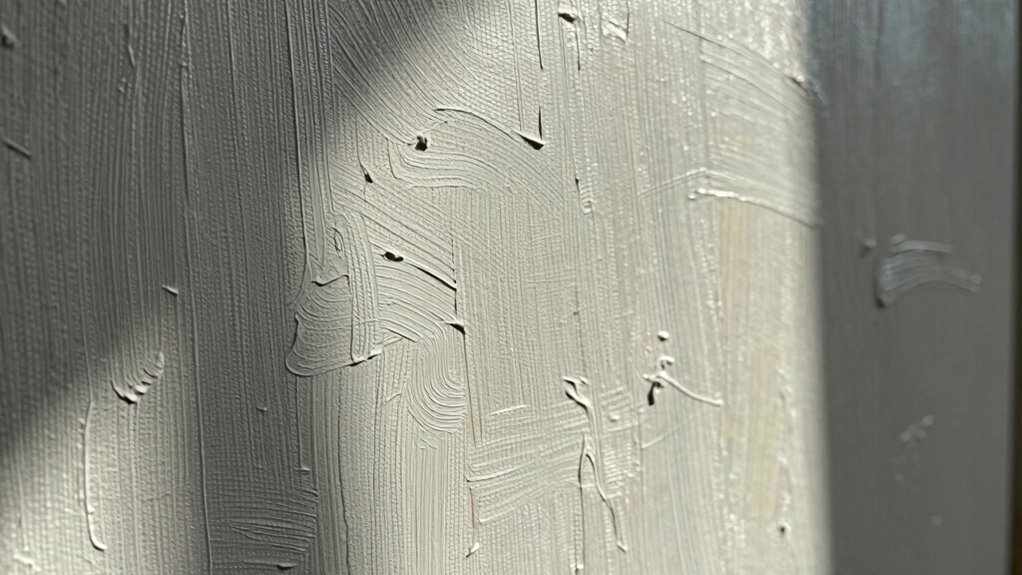
How Shadows and Highlights Create Depth in Your Art

Shadows and highlights are essential tools for creating depth in your textured paintings, as they help define the form and bring your artwork to life. By emphasizing textural contrast, you can make certain areas pop while others recede, adding a dynamic sense of dimension. Shadow play is particularly effective; subtle shifts in shadow intensity reveal the surface’s unevenness and emphasize the painting’s tactile quality. Highlights catch light on the raised areas, enhancing the illusion of volume and depth. Use directional lighting to cast shadows that accentuate the texture’s natural contours, much like how waterfall soundscapes can enhance the atmosphere of a pool area. Furthermore, understanding grinding techniques can help you achieve a more consistent application of paint, enhancing the overall texture. Additionally, having a solid emergency planning strategy can provide peace of mind, allowing you to focus more on your artistic pursuits. Moreover, incorporating dog-friendly spaces in your surroundings can inspire creative themes and compositions. Remember, well-placed shadows and highlights don’t just add realism—they guide the viewer’s eye across your work, making the textured surface feel vibrant and three-dimensional. Furthermore, exploring the transformative impact of techniques like these can elevate your artistic expression and connect your work with broader trends in artistry.
Common Lighting Mistakes That Flatten Your Artwork: and How to Avoid Them
Lighting directly above your artwork can wash out textures and reduce depth, making your painting look flat. Without proper shadow variation, your piece loses dimension and visual interest. To avoid this, distribute light evenly and include angled lighting to enhance the texture and create shadow depth. Additionally, consider using proper lighting techniques that not only illuminate your artwork but also emphasize its unique features.
Overhead Lighting Effects
Overhead lighting might seem like the simplest way to illuminate your textured paintings, but it often does more harm than good. It can flatten the artwork and reduce the impact of color contrast and texture enhancement. To avoid this, steer clear of direct overhead lights that cast uniform, harsh shadows. Instead, consider angled lighting that highlights surface details and creates depth.
Key ideas include:
- Position lights at an angle to enhance texture
- Use softer, diffused bulbs to prevent glare
- Vary light placement for dynamic shadow play
This approach helps bring out the richness of your textures and intensifies color contrast, making your artwork feel more alive and multidimensional. Proper lighting transforms flat surfaces into vibrant, textured masterpieces.
Lack of Shadow Depth
One common mistake that flattens your artwork is neglecting to create enough shadow depth. Without sufficient shadows, textured paintings lose their dimensionality, making surfaces appear dull and lifeless. To avoid this, focus on enhancing color contrast between light and dark areas, which helps define the texture and adds visual interest. Deepening shadows around raised surfaces accentuates the texture, making it pop. Proper shadow placement creates a sense of depth, guiding the viewer’s eye across the artwork. Remember, shadows don’t have to be pure black; subtle variations in tone and color can improve realism and richness. By carefully controlling shadow depth, you’ll boost texture enhancement and prevent your painting from looking flat or two-dimensional. Additionally, incorporating debt management strategies can help you allocate resources for better lighting options that enhance your artwork. Using techniques from grocery savings strategies can also free up funds for investing in quality lighting solutions. A well-lit environment can significantly improve the perception of your work, just as dynamic microphones enhance sound quality in performances. The use of Southern traditions in your lighting setup can also bring a unique flair to your textured paintings.
Uniform Light Distribution
Uniform light distribution is a common mistake that can make your textured paintings look flat and dull. When light spreads evenly across the surface, it minimizes shadows and reduces the perception of depth, hindering texture enhancement and color accuracy. To avoid this, position your light source at an angle that creates subtle shadows, highlighting texture without overpowering colors. Use multiple light sources or adjustable fixtures to prevent flatness and guarantee even yet dynamic illumination.
- Avoid direct, head-on lighting that flattens surface details
- Use angled lighting to emphasize shadows and texture
- Incorporate adjustable lights for control over highlight and shadow balance
How to Adjust Brightness and Color Temperature for Optimal Results
Adjusting brightness and color temperature is essential to showcasing textured paintings at their best. Proper color calibration guarantees the colors appear true to life, highlighting the painting’s details without distortion. Start by setting your lights to a neutral color temperature, around 4000K to 5000K, to avoid warm or cool biases that can skew perception. Brightness levels should be balanced so the artwork is well-lit without glare or shadows that flatten the texture. Consider the ambient illumination in your space; too much ambient light can wash out colors, while too little can make details hard to see. Adjust your lighting until you achieve a natural, vibrant look, allowing the textures and colors to stand out vividly and accurately.
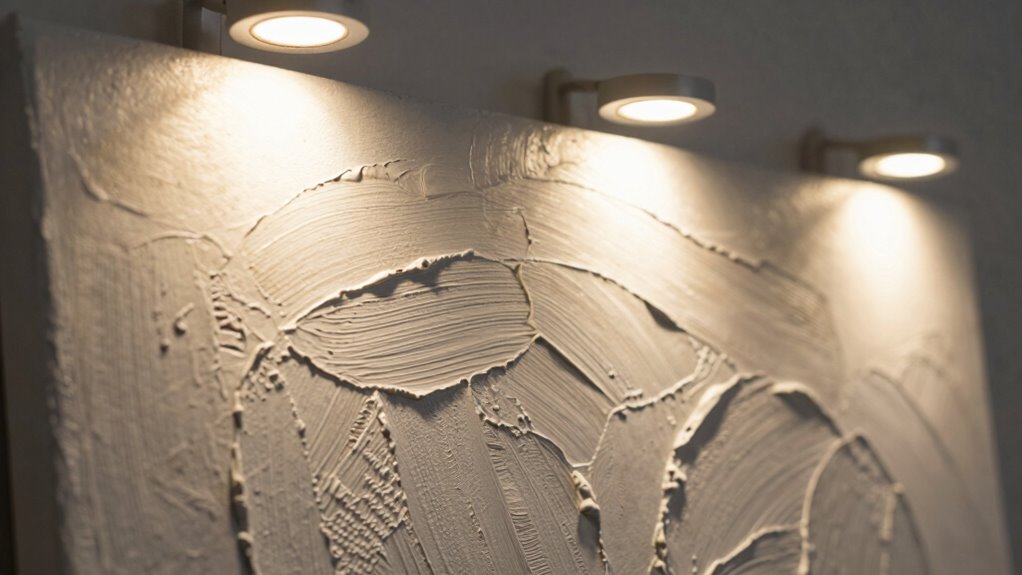
Using Adjustable Lights to Perfect Your Display
Using adjustable lights allows you to fine-tune how textured paintings are displayed, ensuring their depth and details shine through. Proper gallery lighting with adjustable fixtures lets you highlight surface variations and create dynamic shadows. By applying spotlight techniques, you can direct light precisely where it’s needed, enhancing the painting’s three-dimensional quality. Consider these tips:
- Use track lighting to easily adjust angles and intensities.
- Experiment with different spotlight positions to find the most flattering shadows.
- Incorporate dimmers to control brightness and avoid glare or flatness.
This flexibility helps you showcase the texture and depth of your artwork, making it more engaging and vibrant. Adjustable lighting is key to creating a professional, gallery-quality display that captures every nuance of textured paintings.
Troubleshooting Flat-Looking Paintings: Fine-Tune Your Lighting Setup
If your textured paintings appear flat and lack the depth you desire, the problem often lies in your lighting setup. To rectify this, adjust your lights to create stronger color contrast, which enhances the painting’s dimensionality. Position lights at different angles to cast subtle shadows that emphasize textures. Avoid direct, harsh lighting, which can flatten the appearance. Consider using warm or cool tones to bring out specific colors and add vibrancy. Frame enhancement also plays a role—lighting the frame can add visual depth and draw attention to the artwork’s details. Small tweaks, like moving your lights slightly or increasing contrast, can make a significant difference. Fine-tuning your setup ensures your textured paintings pop with depth and life, avoiding a flat, dull look.
Frequently Asked Questions
Can Natural Daylight Enhance the Texture of Painted Artwork?
Yes, natural illumination can enhance the texture of your painted artwork. Daylight enhancement brings out the shadows and highlights in textured surfaces, adding depth and dimension. When you display your painting near a window or in a well-lit space, the changing qualities of daylight emphasize the artwork’s tactile qualities, making textures pop. This natural light creates a dynamic viewing experience, highlighting your painting’s details without flattening its surface.
How Often Should I Adjust My Lighting Setup for Optimal Effect?
You should adjust your gallery lighting regularly, ideally every few weeks, to keep textured paintings looking vibrant. Changing the color temperature and light angles prevents textures from flattening out or fading. As your artwork or display space evolves, tweak your setup to maintain ideal effect. Consistent adjustments ensure the light complements the artwork’s depth, highlighting textures without causing glare or dullness. Stay attentive to how lighting interacts with your paintings for the best visual impact.
Do Different Wall Colors Impact How Textured Paintings Appear Under Lighting?
Yes, wall color influence affects how textured paintings appear under lighting. Lighter walls can enhance texture visibility by reflecting more light, making details pop. Darker walls absorb light, which may diminish texture depth and make the artwork seem flatter. To maximize texture visibility, choose wall colors that complement your painting’s tones and guarantee your lighting setup highlights the texture, regardless of wall color.
Can LED Lights Damage or Fade Textured Paintings Over Time?
LED lights generally won’t damage or fade textured paintings over time if you choose quality fixtures with good LED longevity. They emit less heat and UV radiation compared to traditional lighting, reducing the risk of paint fading. However, prolonged exposure to even low UV LED lights might still cause slight fading. To protect your artwork, use LED lights with UV filters and avoid direct, intense illumination for extended periods.
What Are Quick Tips for Testing Lighting Effects Before Permanent Installation?
Think of your gallery lighting as a dress rehearsal for a performance. Before permanent installation, test different setups by temporarily positioning lights at various angles and adjusting the color temperature to see how it enhances your textured paintings. Use adjustable fixtures or clip-on lights to quickly experiment with different effects, ensuring your artwork’s shadows and highlights bring out the depth without any surprises once installed.
Conclusion
Did you know that proper lighting can boost a textured painting’s perceived depth by up to 50%? By paying attention to angles, shadows, and light types, you can make your artwork truly stand out. Avoid common pitfalls like flat lighting and fine-tune your setup with adjustable lights. With a little experimentation, you’ll transform your display into a mesmerizing, multi-dimensional showcase that highlights every textured detail and brings your art to life.