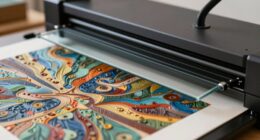

To develop shading techniques using cross-hatching and stippling, you should focus on how to control texture, tone, and surface detail. With cross-hatching, layer intersecting lines at various angles and densities to create depth and texture, adjusting pressure for different effects. For stippling, place dots closer together for darker tones and farther apart for lighter areas, capturing subtle gradations. Mastering these methods allows you to bring realism and surface quality to your artwork—exploring these strategies further will reveal even more techniques to enhance your shading skills.
Key Takeaways
- Cross-hatching employs intersecting parallel lines at varying angles to build tonal depth and texture.
- Stippling uses dots with adjustable density and size to create smooth gradations and detailed surface textures.
- Both techniques require deliberate control over line or dot placement to accurately depict surface qualities.
- Layering lines or dots enhances surface realism, allowing for nuanced control of light, shadow, and texture.
- Combining cross-hatching and stippling can produce complex, realistic shading effects in artwork.

Have you ever wondered how artists create depth and texture in their drawings? It’s a fascinating process that involves more than just applying lines; it’s about mastering shading techniques like cross-hatching and stippling to bring your artwork to life. When you understand how to manipulate texture variation and tonal depth, you gain the power to make flat sketches feel vibrant and three-dimensional. These techniques are fundamental because they allow you to control light, shadow, and form more precisely, giving your drawings a realistic or stylistic edge.
Master shading techniques like cross-hatching and stippling to add depth and texture to your artwork.
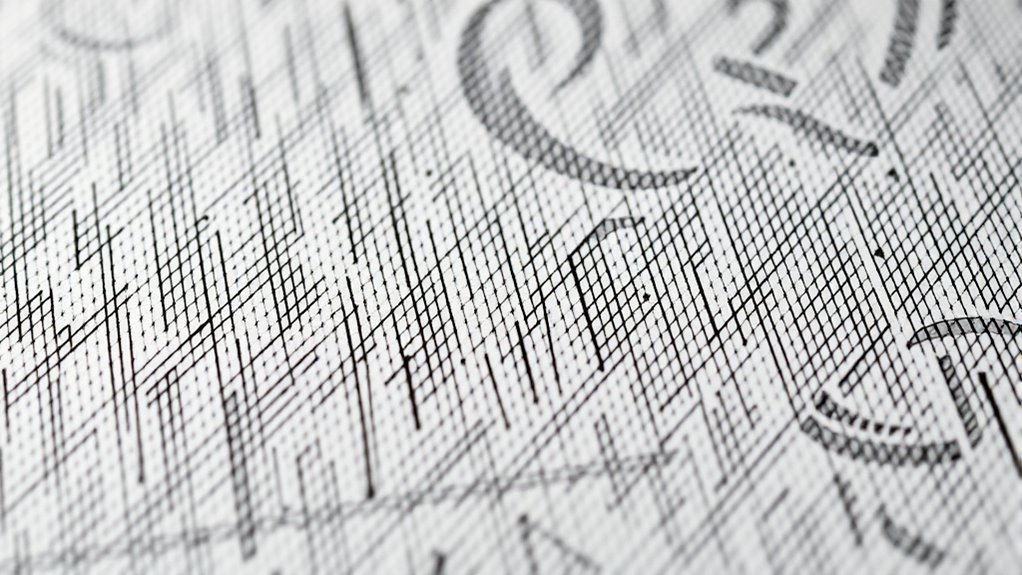
In cross-hatching, you build up tonal depth by layering intersecting lines. Think of it as creating a web of parallel lines that cross over each other at various angles. The density and direction of these lines are your tools for controlling texture variation. For example, closely spaced lines produce darker areas, suggesting shadow, while more spread-out lines create lighter tones. By varying the spacing and angles, you can simulate different textures—smooth skin, rough bark, or soft fabric—adding richness and complexity to your work. The key is to be deliberate with your strokes, adjusting pressure and direction to achieve the desired tonal effect. The overlapping lines also add a tactile quality, giving the impression of surface texture that viewers can almost feel.
Stippling, on the other hand, involves creating shading through dots rather than lines. This method relies on the density and distribution of dots to convey tonal depth and texture variation. The closer the dots, the darker the area appears; the more spread out, the lighter the tone. Stippling offers a high level of control over subtle gradations, which is especially useful for delicate shading or detailed textures. It demands patience, but the payoff is a finely nuanced surface that can capture intricate details. As you practice stippling, you’ll learn how to vary dot size and spacing to create smooth transitions or sharp contrasts, enriching the depth and realism of your drawings.
Both cross-hatching and stippling require you to think critically about how light interacts with different surfaces. They teach you to see not just the form but the subtle shifts in tone and texture that give an object its character. They also connect to the broader understanding of art theory, which explores how visual elements like texture and shading influence perception. As you experiment with these shading techniques, you’ll begin to develop a sharper eye for texture variation and tonal depth, which are essential for creating compelling artwork. Over time, mastering these methods will empower you to craft drawings with a convincing sense of volume and surface quality—making your art more engaging and lifelike.
Top picks for "cros hatch stippl"
Open Amazon search results for this keyword.
As an affiliate, we earn on qualifying purchases.
Frequently Asked Questions
How Do I Choose Between Cross-Hatching and Stippling?
You should choose between cross-hatching and stippling based on your technique versatility and artist preferences. If you want quick shading with softer gradients, stippling is ideal. For more dynamic, textured effects, cross-hatching offers greater control and depth. Consider your style and project needs—if you prefer detailed, layered shading, cross-hatching might suit you best. Experiment with both to see which aligns with your artistic goals.
Can These Techniques Be Combined Effectively in One Artwork?
You can definitely blend these techniques effectively in your artwork, creating a richer texture and nuanced shading. By carefully layering cross-hatching and stippling, you achieve a seamless stylistic integration that enhances depth and detail. Experiment with texture blending, using stippling for softer progression and cross-hatching for more dynamic shadows. With patience and practice, combining these methods can add complexity and visual interest, making your piece truly stand out.
What Tools Are Best for Precise Shading?
You’ll want to use fine shading pencils for precise shading, as they offer control and detail. Hold your pencil with a relaxed grip to improve accuracy and reduce fatigue, allowing for smoother, more controlled strokes. Experiment with different pencil grips and shading pencils to find what works best for you. Using a sharp pencil tip enhances precision, making it easier to achieve detailed shading effects in your artwork.
How Do I Vary Shading Intensity With These Techniques?
Ironically, you might think shading intensity just happens naturally, but it’s all about pressure control and layering methods. To vary shading, press harder or softer with your pen or pencil, and build up layers gradually for darker areas. Light, quick strokes create softer shadows, while multiple layers deepen the tone. Practice adjusting your pressure and layering to achieve smooth progression and dynamic shading, making your artwork more vibrant.
Are There Common Mistakes to Avoid When Practicing?
When practicing, avoid inconsistent technique and abrupt shading changes that disrupt shading fluidity. Keep your strokes steady and uniform, guaranteeing consistent spacing and pressure. Don’t rush; practice gradually to develop smooth progression. Watch out for overdoing stippling, which can look cluttered, and guarantee your cross-hatching lines intersect cleanly without smudging. Maintaining focus on technique consistency and shading fluidity helps improve your shading skills and overall artwork.
Conclusion
Now that you’ve mastered cross-hatching and stippling, imagine the endless possibilities waiting for your touch. Each stroke and dot can bring depth and life to your artwork—yet, there’s more to discover. Will you push your shading even further? The secrets behind these techniques are just the beginning. As you continue experimenting, you might stumble upon a style that’s uniquely yours—something that leaves viewers captivated, enthusiastic to see what you’ll create next.