
TL;DR
For DIY holiday crafts, start with scissors, paper or cardstock, washable glue, markers, paint and brushes, then add materials suited to your project, such as felt, ribbon, or air-dry clay. Match adhesives and tools to the surfaces and the makers’ ages, reuse clean packaging where you can, and let finished pieces dry fully before wrapping or storing them.
A cardboard cereal box, a pair of scissors, and a little paint can become the star on your tree. The trick is having the right supplies for the job, so your paper stars stay crisp, your felt gift tags hold their shape, and your table doesn’t turn into a glitter-covered mystery.

Get art and craft supplies delivered free with Prime
- Fast, free delivery on millions of items
- Prime Video, Amazon Music and more included
- Member-only deals all year
This guide helps you choose art supplies for DIY holiday crafts by what they do: cut and join, shape, decorate, and finish. You’ll find a compact starter kit, kid-friendly safety tips, budget ideas using household materials, and advice for keeping your projects ready for next year.
Think of your supply box like a kitchen pantry: a few versatile staples cover most recipes, while special ingredients make a particular dish sing. You don’t need every color of paint or a drawer of novelty trim. You need materials that suit the projects you actually want to make.
Begin with scissors, glue, paper or cardstock, markers, paint, and brushes; add specialty supplies for a specific project.
Match adhesive to the material: glue sticks for lightweight paper, tacky craft glue for many porous surfaces, and tape for quick paper joins.
For young crafters, choose age-appropriate tools and larger decorations; adults should handle craft knives and hot glue.
Reuse clean cardboard, jars, fabric scraps, and wrapping-paper offcuts to cut costs and give projects more character.
Let paint, glue, and clay dry according to package directions before wrapping or storing finished crafts.
Start with a small kit that handles the most projects
A useful holiday craft kit starts with scissors, glue, paper or cardstock, markers, paint, and brushes. These supplies cover the jobs behind many projects: cutting shapes, joining pieces, adding color, and making small details. Add a few decorations, such as ribbon, yarn, or stickers, and you can make cards, gift tags, paper chains, and simple ornaments without buying a separate tool for each idea.
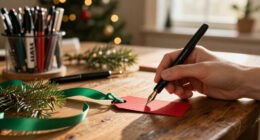
For example, a family making gift tags one evening can cut rectangles from leftover cardstock, decorate them with markers, and punch a hole for ribbon. The same supplies work the next day for paper snowflakes or a painted paper-tube reindeer. This overlap makes a compact kit useful: each versatile item earns its place across several projects, so you spend less on supplies that might otherwise sit unused after one craft session.
Build your kit in layers. Keep frequently used tools together, then add project-specific materials only when you have a plan. That means a small up-front kit is convenient, but it won’t cover every material or finish. If you want to make air-dry clay ornaments, buy clay for that project; if you only plan to fold paper stars, cardstock and a ruler may be enough. Buying to the project also helps you avoid accumulating specialty supplies before you know you need them.
- Cut and measure: scissors, ruler, and scrap paper for testing shapes. A ruler helps make repeated pieces consistent, while scrap paper lets you check a template before cutting into better material.
- Join: glue stick, tacky craft glue, and double-sided tape. Different adhesives suit different surfaces, so a small selection reduces the temptation to force one glue to do every job.
- Color and decorate: markers, crayons, paint, brushes, and a small selection of ribbon or stickers. A limited palette is easier to organize and can make mixed projects feel more coordinated.
- Save: a box or bag for reusable scraps and finished pieces. Separating usable scraps from finished work makes it easier to find materials next time and less likely that delicate crafts get crushed.
Before a group craft, try the materials on a sample. A five-minute test can show whether a paper ornament needs tape, stronger glue, or a different kind of cardstock. That small check can prevent wasted materials and frustration, especially when several people are making the same item.
Popular right now

KitchenAid Artisan Mini Tilt-Head Stand Mixer, 3.5 Quart, Aqua Sky Blue

Dyson Airwrap i.d. Multi-Styler

eufy C28 Robot Vacuum and Mop Combo with HydroJet Roller, 15,000 Pa Suction, and Self-Emptying Station
As an affiliate, we earn on qualifying purchases.
Choose glue and tools that match each material
The best glue depends on what you’re joining: glue sticks suit lightweight paper, tacky craft glue grips many porous surfaces, and double-sided tape makes quick, clean paper seams. A reliable pair of scissors handles most paper and ribbon, while sharp blades and hot glue need adult handling. Matching the supply to the job matters because a weak bond can come loose, while too much wet glue may wrinkle paper or make a project take longer to finish.
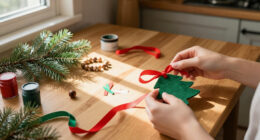
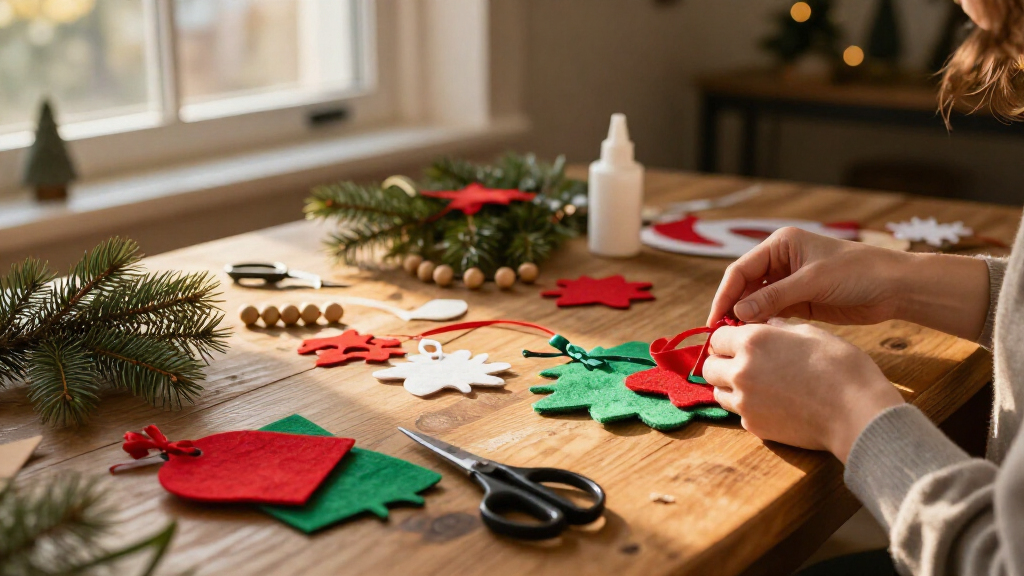
Imagine you’re making a felt mitten ornament. A glue stick may slide over the fuzzy fabric and leave the edge loose, but tacky glue can grip the fibers; for a paper gift tag, that same tacky glue may wrinkle thin paper when you only need a small glue-stick swipe. The tradeoff is that stronger or wetter adhesives may take longer to dry and can be messier, while tape is fast and neat but may not hold heavier pieces securely. The right match saves time and helps the piece survive being handled.
| Supply | Works well for | Example |
|---|---|---|
| Glue stick | Lightweight paper | Sealing a folded card or paper chain link |
| Tacky craft glue | Many porous materials | Attaching felt trim or a wooden craft stick |
| Double-sided tape | Quick paper assembly | Fixing a gift-tag flap without wet glue |
| Scissors and ruler | Cutting and measuring | Trimming even strips for a paper star |
Check labels for suitable surfaces, age guidance, drying time, and cleanup instructions. These details help you choose a product that fits both the material and the time you have: a quick project may benefit from tape, while a keepsake may be worth the wait for a suitable glue to set. If you’re using paint or glue with fumes, follow the label’s ventilation advice. Keep craft knives and hot-glue guns in adult hands; hot glue can burn skin, and a craft knife needs a stable cutting mat and careful handling.
Quick rule: Test a dab of glue on a scrap of the same material before you decorate the final piece. The test shows how the adhesive looks and holds after drying, so you can adjust before the visible surface is finished.
Pick kid-friendly supplies and set up a calmer craft table
For kids’ holiday crafts, choose age-appropriate scissors, washable materials, and larger decorations for younger makers, and keep sharp tools and hot glue with an adult. A calm setup matters too: trays, a washable mat, and supplies portioned into small bowls can turn a chaotic table into a place where little hands can work. The tradeoff is that preparing materials takes a few minutes, but it can prevent spills, reduce waiting, and make it easier for children to focus on the parts they can do themselves.
Consider a Saturday afternoon ornament session with a preschooler and an older sibling. Give the younger child chunky crayons, a pre-cut cardstock shape, and large stickers; let the older one measure and cut ribbon with supervision. Both can decorate together, but they don’t need identical tasks or identical tools. Matching each task to a child’s abilities gives younger makers a real role while letting older children practice more involved steps safely.
Read product labels before children use paint, clay, or glue. Labels explain age guidance, cleanup, and any ventilation needs, which can affect whether a material is a good fit for your space and the ages at the table. Small beads, pom-poms, and other tiny decorations can pose a choking risk for very young children, so choose larger pieces and keep loose embellishments out of reach.
- Cover the table with a washable mat or old paper. This protects the surface and makes cleanup less distracting during the activity.
- Put out only what you’ll use, with paint or glitter in shallow trays. Smaller portions are easier to share and limit how much can spill.
- Show one step at a time, such as adding glue before placing a pom-pom. A clear next step helps children work independently without rushing through the whole project.
- Set aside a drying spot where projects won’t get bumped or touched. Wet pieces can look finished before they are ready to move, so a designated space protects the work.
For a family card-making session, you might offer washable markers, pre-cut shapes, and glue sticks, while an adult handles the craft knife used to trim a cardboard backing. Everyone can contribute without crowding around a risky tool, and washable supplies make cleanup simpler if the activity gets messy.
Stretch your budget with clean, reusable materials
You can make plenty of holiday crafts on a budget by pairing a few reusable basics with clean household materials. Cardboard, jars, fabric scraps, paper tubes, and wrapping-paper offcuts can become the main event, with store-bought paint or ribbon added only where it improves the project. Reuse lowers the amount you need to buy, though it can take a little extra sorting and preparation to find pieces that are clean, sturdy, and suited to the design.
Say you want to decorate a mantel without buying a full craft kit. Cut stars from a clean cereal box, wrap a few with leftover paper, paint others, and string them on yarn. A single pack of markers and one roll of tape may be enough. The cardboard gives the garland structure; the varied finishes make it feel collected rather than uniform. Using what you have also means the stars may vary in thickness and finish, which can add character but may take extra care when you string or store them.
Plan quantities before shopping. If six people are making two tags each, you need twelve sturdy blanks plus a few extras for crooked cuts or spilled paint. A quick sketch and headcount can keep you from buying a large pack of embellishments that ends up in a drawer until next December. Planning also helps you spot where reusable materials can fill a gap, while leaving room in the budget for a purpose-built item if the project needs one.
- Save clean packaging and fabric offcuts in a labeled box. Sorting by material makes scraps easier to use and keeps damp or unsuitable pieces out of the supply pile.
- Use recycled-content paper or refillable markers when they suit the project and are available. These choices can reduce waste, but the material still needs to perform well for the craft you have planned.
- Choose decorations that can be reused, such as ribbon, wooden shapes, or sturdy gift tags. Reusable pieces may cost more at first, but they can serve several holidays if stored carefully.
- Keep leftover scraps sorted by material for the next project. Small pieces are useful for details, while larger pieces are better saved for templates or main shapes.
Reuse doesn’t mean every scrap belongs indoors. Clean and dry natural finds such as pinecones before bringing them inside, and check for moisture or insects. For anything that will sit near lights or heat, use sound materials and follow the product’s safety directions. A reused material is a good bargain only if it is suitable for where and how the finished craft will be used.
Make ornaments and gifts sturdy enough to keep
To help a handmade ornament last, use a sturdy base, choose an adhesive suited to its materials, and let every layer dry fully before hanging or wrapping it. Drying time is part of the craft, not a boring pause: it gives paint and glue a chance to set before the finished piece gets tugged, stacked, or packed away. Rushing this stage can leave fingerprints, smudged color, or joints that separate under pressure, so build the wait into your craft schedule.
- Pick the base. Cardstock works for flat ornaments; felt, fabric, craft sticks, and air-dry clay suit other shapes. The base affects both the look and how well the piece handles storage, so choose for the way it will be displayed.
- Test the join. Glue a small scrap pair together and check that the adhesive holds after drying. This can reveal whether the glue suits the surfaces before you use it on a finished piece.
- Decorate in layers. Let wet paint dry before adding ribbon, stickers, or a second color. Separating wet layers helps prevent colors from smearing and decorations from shifting.
- Finish for display. Add string, an ornament hook, or a gift tag once the piece feels dry and secure. Check the attachment point gently because it carries the weight when the ornament hangs.
- Store with care. Place fragile work in a labeled box away from moisture and heat. Separating delicate pieces limits rubbing and makes them easier to find next season.
For example, a clay ornament can look dry on the surface while the thicker center still needs time. Follow the clay package directions, then wait until the piece is fully dry before painting or wrapping it. A clear sealant may suit some finished pieces, but check its label for use and ventilation guidance. More finishing steps can add protection or a polished look, but they also add time and may not suit every material.
Durability depends on the job. A paper snowflake for this year’s window can be delicate; a keepsake gift tag should be stiff enough to survive a trip in a box. The more handling or storage a piece needs to withstand, the more useful a firm base, secure join, and protective packing become. If you’re making a gift for someone else, try handling the finished piece as the recipient might before you pack it.
Use these key points for a smoother holiday craft day
The most useful key points for a holiday craft day are to plan around the project, set out the right amount, and leave time for drying. A little preparation keeps the activity focused, especially when several ages or skill levels share one table. It also helps you notice practical constraints early, such as whether a project needs adult tool handling or more space than the table provides.
Before guests arrive, count the people and decide what each person will make. Put the shared scissors and ruler within reach, but portion out paint and glitter in small amounts. If you’re making cards, set out paper, markers, glue sticks, and a scrap bin; if you’re making felt ornaments, add tacky glue and pre-cut shapes instead. Tailoring the setup means less time searching for supplies, though a small reserve of shared materials can help when a piece tears or someone wants to make an extra item.
This is also where beginner-friendly kits can help: they reduce the number of choices and make it easier to start. But a kit may not include enough of a frequently used supply, or it may contain decorations you won’t use. Check the contents against your project before buying, and mix in household materials where they fit. A kit saves planning time, while a custom assortment can give you better control over quantities and materials.
A simple rule of thumb is to allow a few spare blanks for mistakes and to keep one sample finished piece on the table. If a child asks, “How does the ribbon attach?” you can point to the sample instead of repeating every instruction. That small visual cue helps people work at their own pace and makes the project easier to follow without requiring everyone to decorate in exactly the same way.
Make the project fit the table: choose a short, forgiving activity when you have mixed ages, and save detailed cutting or multi-step assembly for a smaller group. The simpler activity may offer fewer choices, but it is more likely to leave time for everyone to finish and clean up comfortably.
Frequently Asked Questions
What basic art supplies do I need for holiday crafts?
Start with scissors, glue, paper or cardstock, markers, paint, and brushes. Add a few decorative materials, such as ribbon, yarn, or stickers, based on the projects you want to make. That kit covers many cards, tags, and simple ornaments.
What supplies are best for kids?
Choose age-appropriate scissors, washable materials, and larger decorations for younger children. Read the labels on paint, glue, and clay for age guidance and cleanup instructions. Adults should handle sharp blades and hot-glue guns.
What glue works best for holiday crafts?
Use a glue stick for lightweight paper, tacky craft glue for many porous materials such as felt or wood, and double-sided tape for quick paper assembly. Check the label for suitable surfaces and drying time, and test the adhesive on a scrap first.
How can I make holiday crafts on a budget?
Reuse clean cardboard, jars, fabric scraps, paper tubes, and wrapping-paper offcuts, then buy only a few versatile basics. For example, leftover cardstock and markers can make a batch of gift tags without a special kit. Plan the number of projects before purchasing decorations.
How can I make crafts last until next year?
Let paint and glue dry fully, and follow package directions for clay or any sealant. Store fragile pieces in a labeled container away from moisture and heat. A sturdy base, suitable adhesive, and careful packing help ornaments hold up between holidays.
Conclusion
Start with a small, useful kit, then let your project decide what comes next. Match the material, glue, and tool, keep safety and drying time in the plan, and save clean scraps for another afternoon.
A cereal box can become a bright paper star, a ribbon offcut can finish a gift tag, and a few patient minutes can turn both into keepsakes. Pick one project, gather only what it needs, and see what your craft table can make holiday magic from.