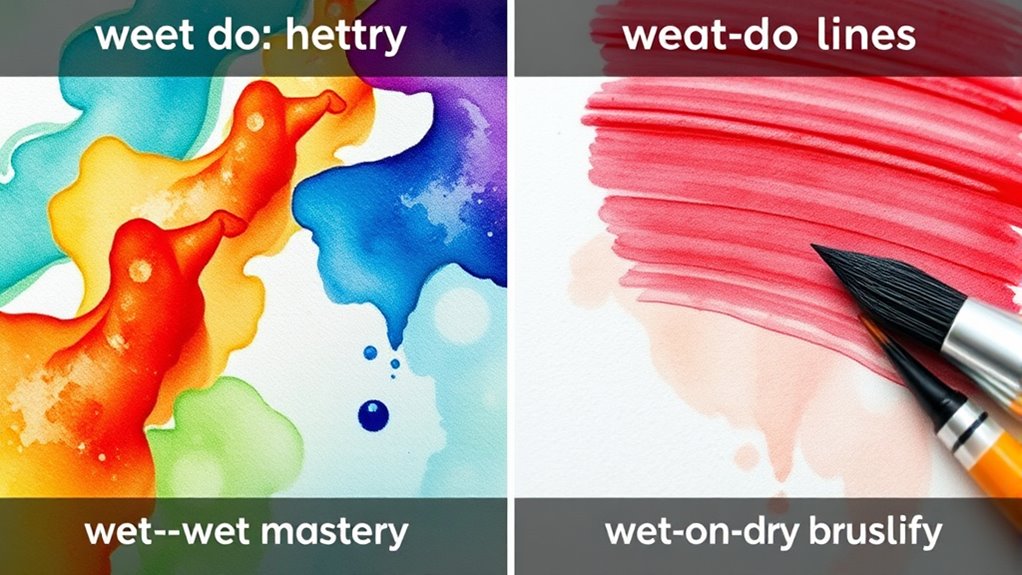

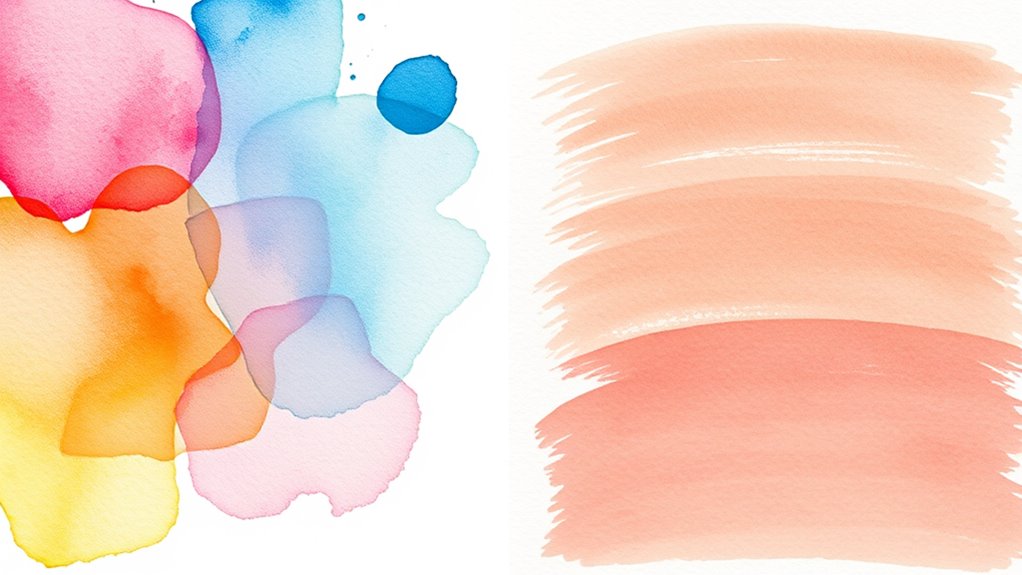
Wet‑on‑wet and wet‑on‑dry are two core watercolor techniques. With wet‑on‑wet, you apply color onto a damp surface, creating soft blends and flowing gradients ideal for backgrounds and atmospheric effects. Wet‑on‑dry involves painting onto dry paper, allowing for precise lines and detailed shapes. By mastering both, you gain better control over your artwork’s texture and depth. Keep exploring, and you’ll discover how combining these methods can elevate your skills further.
Key Takeaways
- Wet‑on‑wet involves applying wet paint onto a wet surface for soft, seamless color blending, ideal for backgrounds and skies.
- Wet‑on‑dry applies wet paint onto dry paper, offering sharper lines and greater control for detailed elements.
- Wet‑on‑wet creates natural gradients and atmospheric effects, while wet‑on‑dry allows precise layering and defined shapes.
- Wet‑on‑wet is faster and more expressive but less precise; wet‑on‑dry is slower, enabling detailed, controlled work.
- Combining both techniques expands artistic flexibility, balancing fluidity with accuracy in watercolor paintings.
Exploring watercolor techniques can transform your artwork from simple sketches into vibrant, expressive paintings. Among the most fundamental methods are wet‑on‑wet and wet‑on‑dry techniques, each offering unique effects and challenges. Understanding how to leverage these approaches allows you to control color blending and brush techniques more effectively, giving your paintings depth and dynamism.
Watercolor techniques like wet-on-wet and wet-on-dry unlock vibrant, expressive painting possibilities.
With the wet‑on‑wet technique, you start by applying clean water to your paper before adding pigment. This approach creates soft, flowing transitions because the colors spread and blend seamlessly on the wet surface. When you lay down paint on already damp paper, the colors naturally merge, producing subtle gradients and atmospheric effects. This method is ideal for creating backgrounds, skies, or water scenes where smooth color transitions are essential. To maximize its potential, you need to master brush techniques that control the amount of water and pigment you use. Gentle, sweeping strokes work best for blending colors effortlessly, allowing you to achieve a harmonious, luminous look. As you work, pay attention to how the colors interact; you might find that layering different hues while still wet produces interesting, unpredictable effects. The key to successful color blending in wet‑on‑wet is to keep your brush moist and to work quickly, as the paint will dry faster than you might anticipate. Additionally, understanding the water-to-pigment ratio helps in achieving the desired effects and avoiding muddy colors.
In contrast, the wet‑on‑dry method involves applying wet paint onto dry paper, giving you more control over the edges and details. This technique is perfect for creating crisp lines, sharp shapes, or detailed elements within your composition. It allows you to build up layers gradually, giving you precise control over color placement and intensity. When using wet‑on‑dry, your brush techniques should focus on controlled, deliberate strokes to maintain sharpness. You can also use dry-brush techniques to add texture or fine details on top of dried paint layers. Because the paint doesn’t spread as much, you’re able to manipulate color blending more intentionally, blending colors softly or creating defined boundaries as needed. This method often requires patience, as each layer needs to dry before you add new details on top.
Mastering both wet‑on‑wet and wet‑on‑dry techniques broadens your artistic toolkit, enabling you to choose the right method for your desired effect. Experimenting with these approaches deepens your understanding of color blending and brush techniques, ultimately elevating your watercolor skills and allowing you to produce more expressive, polished paintings.

Grabie 50 Colors Watercolor Paint Set, Detail Paint Brush Included, Watercolor Paints, Painting Sets, Art Supplies for Painting, Travel Watercolor Set, Amateur Hobbyists
50 Essential Colors for Every Artist: A carefully curated palette of vibrant, rich pigments that cater to all…
As an affiliate, we earn on qualifying purchases.
As an affiliate, we earn on qualifying purchases.
Frequently Asked Questions
How Do I Prevent Colors From Bleeding Unintentionally?
To prevent colors from bleeding unintentionally, you need to master drying control. Let each layer dry completely before adding new colors, especially when working with wet-on-dry techniques. Use a hairdryer or blot gently with a paper towel to speed up drying if needed. Keep your brush clean to avoid muddy colors, and work gradually, allowing each section to dry thoroughly. This way, you minimize unwanted color bleeding and achieve crisp, clean edges.
Which Technique Is Better for Detailed Work—Wet-On-Wet or Wet-On-Dry?
Think of detailed work as sculpting with watercolor, where precision is key. Wet-on-dry is your chisel, allowing sharp edges and fine lines, perfect for layering techniques and texture creation. Unlike wet-on-wet, which creates softness and blending, wet-on-dry gives you control and clarity. You’ll find it better suited for intricate details, making your artwork more defined and polished. Embrace this technique for crisp, detailed effects that truly stand out.
How Do I Control the Drying Time for Different Effects?
To control drying time for different effects, use drying accelerators or paint modifiers. Add a small amount of a drying accelerator to speed up the process for quick layering or blending. Conversely, dilute your paint with water or use thicker applications to slow drying for more detailed work. Adjust these factors based on your desired effect, allowing you to manage the paint’s drying rate effectively.
Can I Use Both Techniques in One Painting Seamlessly?
Absolutely, you can blend both techniques in one painting like mixing oil and water—imagine seamless shifts and vibrant textures! Use blending techniques for smooth gradients with wet-on-wet, then switch to wet-on-dry for sharp details. Layering strategies let you build depth without muddying colors. Mastering both lets you create dynamic, cohesive artwork, effortlessly switching between soft backgrounds and crisp accents. Practice consistently, and you’ll achieve stunning harmony in your paintings.
What Type of Paper Works Best for Each Technique?
You should choose paper with a smooth texture and a heavier surface weight, like 300 lb Cold Press, for wet-on-wet techniques, as it accommodates water without warping. For wet-on-dry, a slightly rougher paper with a lighter weight, such as 140 lb Cold Press, works well, offering more control and texture. Matching paper texture and surface weight to your technique ensures better control and vibrant results.

Sterling Edwards Blend/Glazing Brush Blue – 1 In
Blending and Glazing Brush by Sterling Edwards
As an affiliate, we earn on qualifying purchases.
As an affiliate, we earn on qualifying purchases.
Conclusion
By understanding the difference between wet-on-wet and wet-on-dry techniques, you can discover new creative possibilities in your watercolor paintings. Experimenting with both methods reveals that wet-on-wet creates soft, flowing blends, while wet-on-dry offers more control and sharp edges. The truth is, blending these techniques often yields the most dynamic results. So, don’t be afraid to explore and find your unique rhythm—your artwork will thank you for it.

Hapikalor Watercolor Paper Pad, 9"x12" Water Color Paper, 140lb/300gsm Artist Painting Drawing Paper Book, Art Supplies for Adults Kids, Watercolors, Watercolor Paint Set, Sketchbook, Journal, Teal
【Premium Heavyweight Cold Pressed Watercolor Paper】1Pack of 9" x 12" Professional Heavyweight Watercolor Pads. 20 sheets in each…
As an affiliate, we earn on qualifying purchases.
As an affiliate, we earn on qualifying purchases.

Mr. Pen- Airtight Watercolor Palette with Lid, 18 Wells & 2 Mixing Areas
Package includes 1 airtight watercolor palette with 18 wells for different paint colors and 2 large mixing areas.
As an affiliate, we earn on qualifying purchases.
As an affiliate, we earn on qualifying purchases.